InkSoft is happy to announce that Rapid Product Creator (“RPC”) is now available in your InkSoft powered Online Store.
RPC is the fastest way to create pre-decorated products for your InkSoft Online Store!
What does this mean?
You can now get products into your online stores in a quicker, easier to use, and less stressful way. We listened to you, the InkSoft customers, and realized that building products for your stores took time, skill, and effort that could be better spent elsewhere.
Now you can easily take your production ready art, apply it to blank products, and put those products into your InkSoft store seamlessly.
Between our integrated supplier feeds, bulk product upload, and now Rapid Product Creator, time should no longer be an issue when creating an InkSoft Online Store for your customers.
How do I get this in my store?
Good news…Rapid Product Creator is automatically enabled in your InkSoft Online Store.
Now What?
Just watch the video, read the help guide/information below, or attend the training session Friday 12/1/17 at 1:00 PM EST (register here) to learn how to use it to its full capability, and be ready to go!
How Do I Use It?
Our Rapid Product Creator is directly linked to the individual store itself.
After going through our store creation wizard, you will be able to create your pre-decorated products.
Upload Art
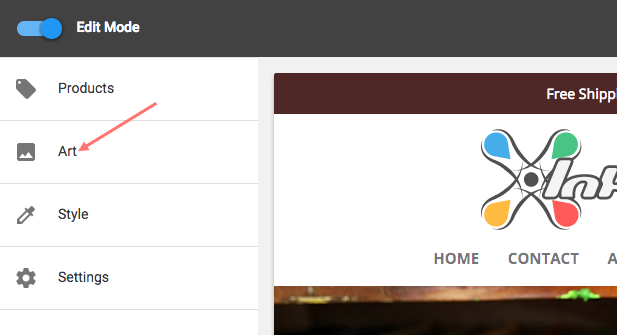
- Click Edit Mode (Top Left)
- Click Art (Optional)
“‹”‹
- Click Upload Art – to drag and drop or upload your production ready designs to be used
“‹”‹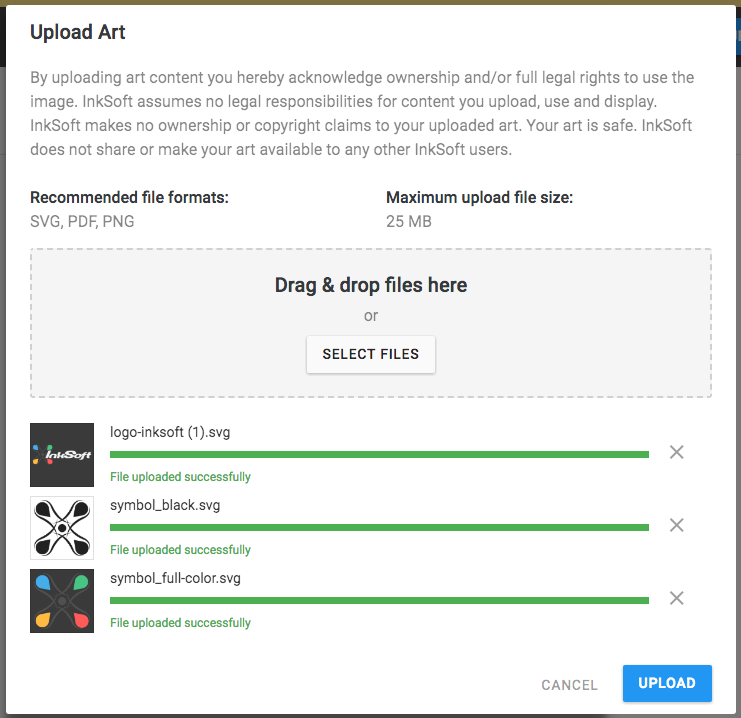
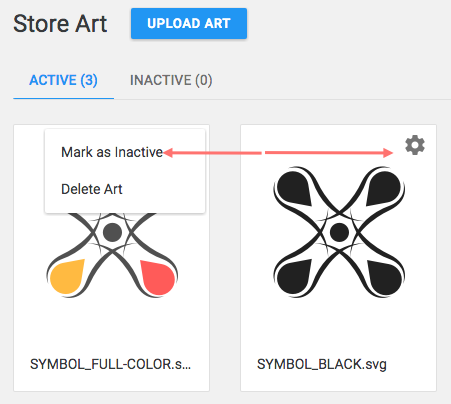
- Active vs. Inactive – Artwork will come in as Active. You can set your artwork as Inactive if you would like to keep it on file and use at a later date.
- Mark Inactive
- Click Gear Icon
- Mark as Inactive – Will move your artwork to an Inactive state
- Delete Art – Removes uploaded artwork completely. Although there is rarely a need to delete any art because you can simply mark inactive.
 “‹”‹
“‹”‹
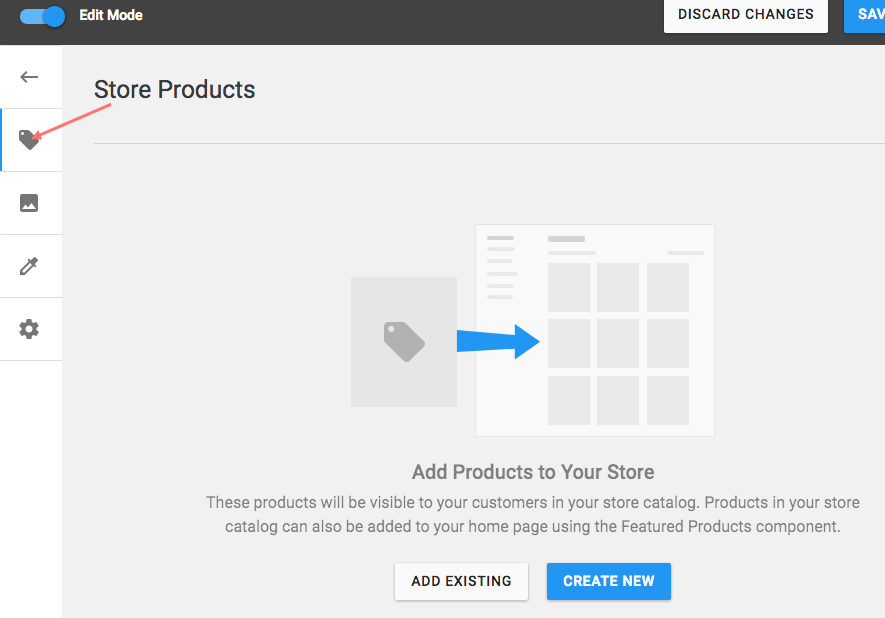
Rapid Product Creator (Pre Decorated Products)
- Click Product Tag Icon
- Add Existing – Any Pre Decorated Products created within your Admin Portal
- Create New – (Rapid Product Creator) Will open up your blank product catalog
“‹”‹
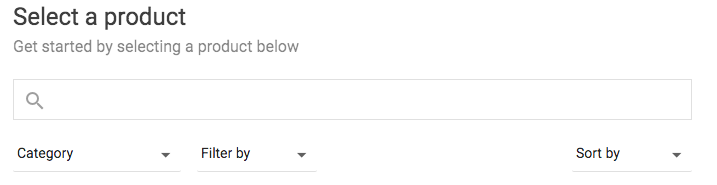
Find a Product & Art Asset (Design)
- Search Bar – Enter sku or name to find a specific product
- Category – Filter by a category you have set
- Filter By – Filter by Supplier, Manufacturer, etc.
- Sort By – Product Cost or Product Name
“‹”‹
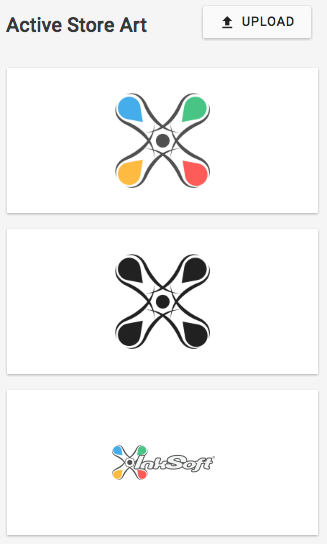
- Active Store Art – On the right, you will see the artwork that you have uploaded. If you need to add another Art Asset- Use the Upload Art Button.
 “‹”‹
“‹”‹
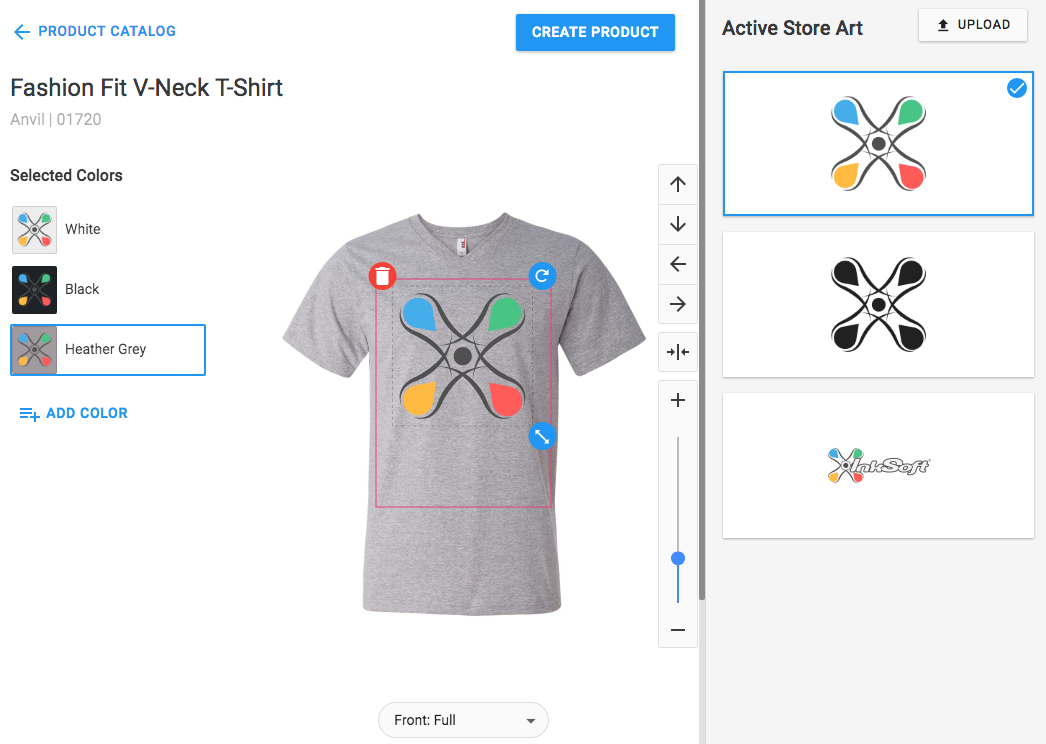
Add Artwork to Product
After Selecting your first product, you will see your Selected Colors on the left, Product in the middle and Active Art to the right.
- Hover over the Art to see a preview over the product
- Click Design to stretch, drag and drop artwork onto product
- Click Add Color to add another product color
- Click Create Product when you have finalized your product selection
“‹”‹
Product Shelf
After selecting Create Product, you will be taken back to your Select Product page to start creating your next pre-decorated product.
- View Products will take you to your product shelf. This will allow you to maintain a listing of the products you have created
“‹”‹
Product Details
- Click Next: Product Details – to enter product information
- Product Name – will populate the products original name (Edit Name Optional)
- Default Color – change the first product color your shoppers will see
- SKU – will pull in the blank product sku and add a unique identifier (Edit SKU Optional)
- Price – Enter the price that you want to sell your product
- Edit – will take you back to Rapid Product Creator workflow to make any changes
- Delete – remove the product completely
- Click Finish – to activate your products in your store
“‹ “‹
“‹
Questions?
Online Stores or RPC still giving you trouble? Contact the Success Squad at support@inksoft.com, and we’ll help you out!
Still not a customer? Looking to improve the way your shop operates? We’d love to show you around.
