
Bottom Line Up Front: Today, we’re excited to announce two newly released features that’ll help you speed up your invoicing, reduce the chance for human error, and remove some of the friction in your end-consumers’ buying experience! We can’t wait for you to start using them to your advantage. Full details below.
Today’s New Feature Announcement is a doubleheader.
That’s right, we’re releasing two new features — and giving you the details you need to start taking advantage of them — right here, right now.
Both of these features are behind-the-scenes additions that you have full admin control over, which means that you can activate them, customize them, or ignore them altogether. But whatever you do, whether you use them to speed up your operations or smooth out your customers’ buying experience, remember that the choice is always up to you.
These features were only created to benefit you — so there’s no obligation, and there’s no consequences. Take what you need and leave the rest.
With that said, let’s dive into the first newly released feature: Hidden Coupon Codes.
Hidden Coupon Codes: The Breakdown
When you have a customer that’s ready to check out on your Online Store, you want them to be able to fill out their information and complete the order — without any confusion or friction. You don’t want them thinking, hey, maybe I’m not getting the best deal here.
Discount codes and coupon codes — and even gift certificate codes — are great when they’re used at the right time. They help make consumers feel included and valued, they help increase brand exposure when they’re marketed well, and they help boost sales when doled out with urgency.
But when you’re not handing out discount codes and seasonal coupons, the “Coupon Code” box on the checkout screen could have the opposite effect. Instead of making end-customers feel included, it could make them feel left out — and leave them wondering why they weren’t invited into the exclusive fold.
A few apparel decorators came to us with that fear, after hearing from end-customers who inquired about whether there was a coupon code for them to use. There wasn’t, and these businesses didn’t want to feel obligated to create one — but they also didn’t want their consumers to feel undervalued.
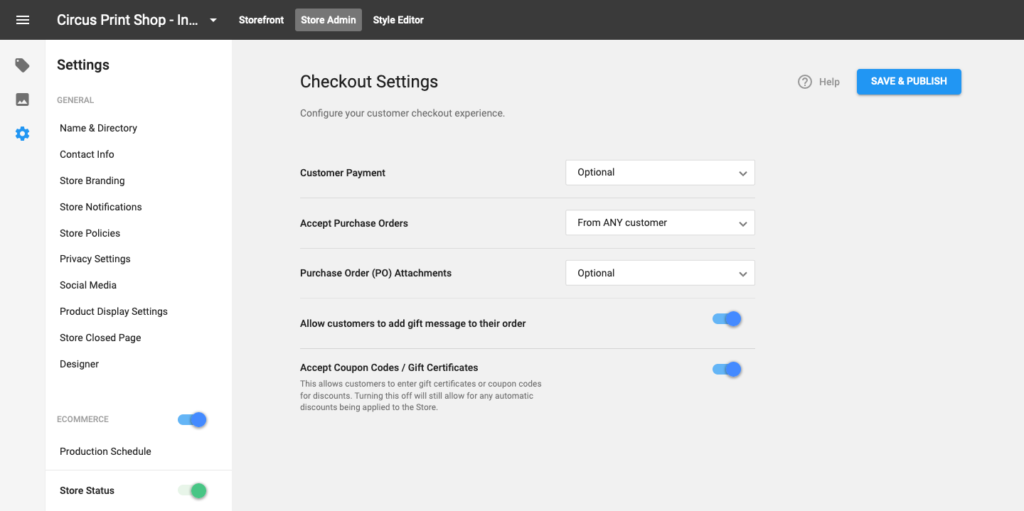
That’s why we created this feature: the option to hide the Coupon Code box when you don’t need it to be active. It’s as easy as going to the checkout settings in your Online Store, finding the “Accept Coupon Codes/Gift Certificates” toggle, and switching it off.
So when you don’t have an active coupon code making the rounds, and you don’t want the end-consumers to feel excluded from something that doesn’t even exist, you can simply make the option disappear. You can remove it from your checkout page — until you need it back up there again.
Because we’re all about constantly working to make the buying experience as smooth, and as pleasant, as possible — and we know you are too.
Custom Tax Rates: The Breakdown
If you’re looking to expedite your backend processes this year, we’ve adopted a new feature to help you get your invoicing streamlined — in a way that reduces the possibility for error. It might not be everybody’s favorite topic, but when we talk about ways to enhance the efficiency of taxation, we know you get just as excited as we do.
Here’s the new feature: a way to set a default tax rate — right in InkSoft’s Proposals invoice system.
Not only does setting a default tax rate speed up your invoicing (because it’s one less step you need to account for), but it also leaves one less step for your team to potentially leave a human error inside of. With the default tax rate, you know exactly what’s present on the invoice every time — which means less uncertainty, less incongruity, and less effort.
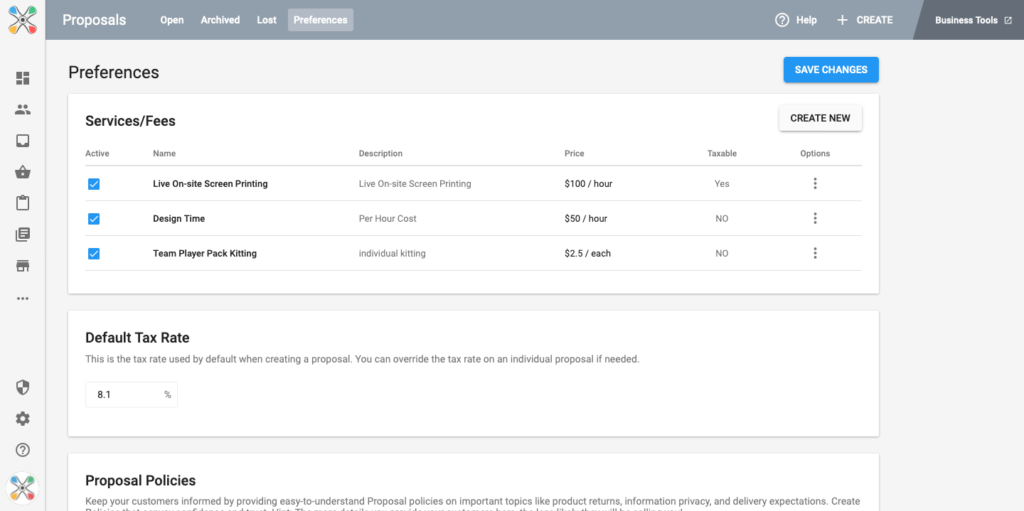
So how do you use the feature? As soon as you’re in Proposals, click on your preferences. From there, you’ll see the option to set a Default Tax Rate (under the Services/Fees section), and you’re able to set any rate that you’d like.
Then, when you’re in an individual Proposal, you’ll be able to see the Default Tax Rate (that you entered) already implemented. You won’t be able to amend the Default Tax Rate directly here, but if you don’t want to use that particular rate for the project, you can simply go to the “Taxation” dropdown bar — one menu item above the Default Rate — and click “Non-Taxable” or “Custom Tax Rate.”
You’ll be prompted to include the reason for the proposal being non-taxable, or to set the custom rate right there. In either case, you can personalize as you see fit.
But, for the vast majority of your proposals that require the same tax rate, setting a default rate ahead of time can save you the thing you need most — time.
And we’re always big fans of any feature that has the power to do that.
Two Features, One Purpose
And that purpose is to make your day-to-day easier. So we hope that you feel familiar enough with these features now to start utilizing them in your business, and we hope that you find they really do something positive for your operations.
