Have you heard of Affinity?
I didn’t until recently so you aren’t alone.
This is an extremely affordable graphic design platform that is an alternative to using Photoshop, Illustrator or even CorelDraw.
With a one-time cost of only $49.99 each for Affinity Photo or Affinity Designer, it is gaining momentum with the graphic community. They also have an iPad version for $19.99.
That’s right. For under $20 you can be building professional level creative work with your finger on your iPad while you goof off on the couch.
Sweet!
Welcome The New
For the last few months, I’ve been playing around with Affinity for the images I’ve been using for the InkSoft content that I create. Hopefully, you’ve seen them!

Graphic for the first episode of The Big Idea, created in Affinity Photo.
I’ll be honest, there have been plenty of times that I really struggled to complete these graphics. Mainly because I simply didn’t know where the tools were located, or how to do a technique that I could do in my sleep in Photoshop, accomplished in Affinity.
Like anything, you just have to make mistakes and learn from them.
So, will Affinity work in your shop? You bet.
Will it drive you crazy while you make the switch? You bet.
You just gotta get in there and make a mess.
Already an Affinity user and I missed something? Hey, please drop a tip in the comments section. I’m certainly not going to cover everything below.
Super loyal Photoshop, Illustrator or CorelDraw user that won’t ever switch?
That’s cool.
I’m interested to learn why! Leave a comment as well.
By the way, I’m not a CorelDraw user so I won’t be comparing that. Sorry if that’s your cup of tea and you need that info.
Affinity General Overview
The first thing I learned is that on a general workflow basis, all the usual file types can be opened in Affinity. I tested a random assortment of files and it didn’t have any major issues.
This means there isn’t much of a drop off if you have your customer sending you a file in Photoshop or Illustrator. That answers the biggest question as we have to play with others in the sandbox.
Yet, just because it did open the file doesn’t mean Affinity will support everything from another software platform. Anything that is exclusive to a program, such as “Smart Objects” in Photoshop sometimes may not play nice. At least, that’s what some user groups are saying.
When I tested it though, the Smart Object layer scenario worked. This is our logo as a vector Illustrator .eps dropped into Photoshop and saved as a Smart Layer. This Photoshop .psd file opened fine in Affinity Photo.

Smart Object within a .psd file opened fine in Affinity Photo.
Also, Affinity is a one-way street. You can open other files types, but if you send an Affinity file to someone they can’t open it unless they have Affinity. So, you’ll have to export it.
I would recommend using the traditional .pdf route if you are sending your creative work to someone else.
Affinity – What I Liked
Overall, I found Affinity to be easy to use.
I’m a get my idea-gelled-first-type of a guy with a doodle on a Post-It-Note. So the software tool I use to create is more about the file construction than anything.
I would rank my current ability with the program in the “still learning” camp. As I still don’t know what I don’t know. I am by far, not an Affinity power user.
Which is good for this article, because when you start with it you won’t be either.
Once I got out of the “hey this isn’t like what I’m used to,” I started accepting the platform on its own merits. I was able to learn and work faster. That might be comparable to learning Spanish or trying out a new jalapeno popper recipe.
“Usted puede tener que comer un montà³n de pimientos diferentes para averiguar cuà¡les son demasiado calientes para manejar.”
(Muchas gracias Google Translate)
I like the interface. Although I’ll freely admit I toiled to find the same tools I’ve been long accustomed to using. Once I understood how Affinity organizes and ranks the information I was able to work much faster.
Old dog, new tricks problem.
I also liked the hint messages located underneath the working area. Once I discovered this, it made my work much easier using the platform.
In fact, I felt dumb for not seeing this earlier as I spent about twenty minutes trying to enlarge an image component. There isn’t a scale tool and I couldn’t complete a basic step. Affinity has evolved to the point that this isn’t handled using a button tool. All I had to do was look.
The tip was in front of me the entire time.
Doh!

Here’s an example of a hint message Affinity shows when working.
Affinity – What I Don’t Like
Besides the Scale tool fiasco, there are some items with Affinity that didn’t float my boat. Namely the Affinity “Personas”, which are developmental workflows for how you use the software.
I’d give them a “Meh” rating.
These are preset toolsets that allow you to accomplish a specific task. At the end of some of these, I’m posting a video that I watched about the feature when I was learning. Just click on the word “Video” to view that subject matter tutorial.
If you do get Affinity, I would highly recommend subscribing to the Affinity Vimeo channel as there is a great library of fantastic videos.
I found them to be very helpful.
Affinity Photo 5 Personas:
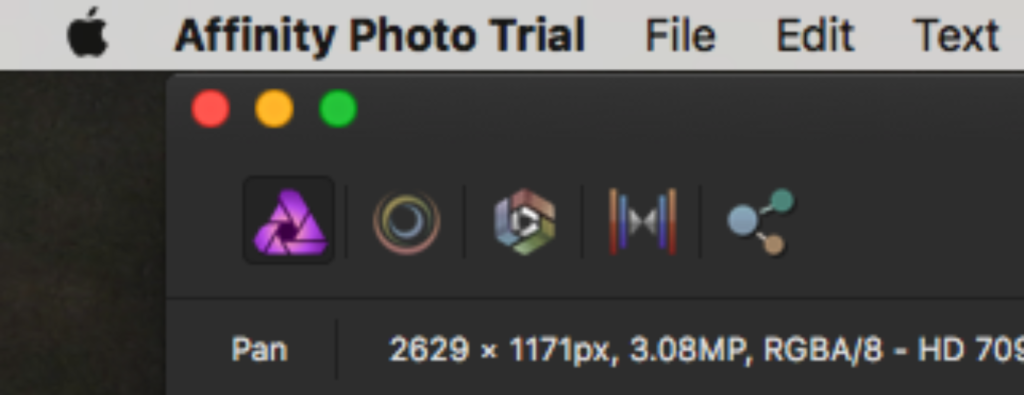
Example of the five Affinity Photo Persona icon buttons.
Photo Persona
Here’s where you work to edit your pixel based image. Lots of tools you are familiar with are usable with this Persona, you just need to find them. Video.
If you don’t see a tool or panel you are used to using, try going to View>Studio> to find more. I’m an “Info” panel freak, as I like to know my numbers when editing an image and that’s where you can find that.
Liquify Persona
This allows you to distort an image with a simple mesh interface. I use this a lot for tweaking things in images, so I was interested to see how they did it. Video.
The Liquify Persona is convenient for smudging, warping or pulling at the image. What’s great here is that you can play with the interface and see the live results before it is applied to the image.
Develop Persona
With images, I like to work macro to micro for improvements. Here’s where you go for macro adjustments to Raw files to clean up anything you don’t like about the image before you use it in a working file. Video.
The tools to adjust exposure, contrast, saturation or other high-level color attributes live here. There’s also a great preview command here if that helps you work. I liked the side by side comparison the best.
Tone Mapping Persona
Here’s where you can easily update and add depth to the image with some tools. Video.
This adds artistic flavor to the piece. Want to add 123% more drama? Go here.
Export Persona
This is for obviously sharing the images with various means. Video.
Ready when you want to export multiple images as Slices. This can be a good trick if you need to send many images in a different format in a few resolutions. This is the “power export” feature that you could use if you are working on a lot of files for a project.
For example, getting a group of images ready to upload to a website as .png files.
Affinity Designer 3 Personas:
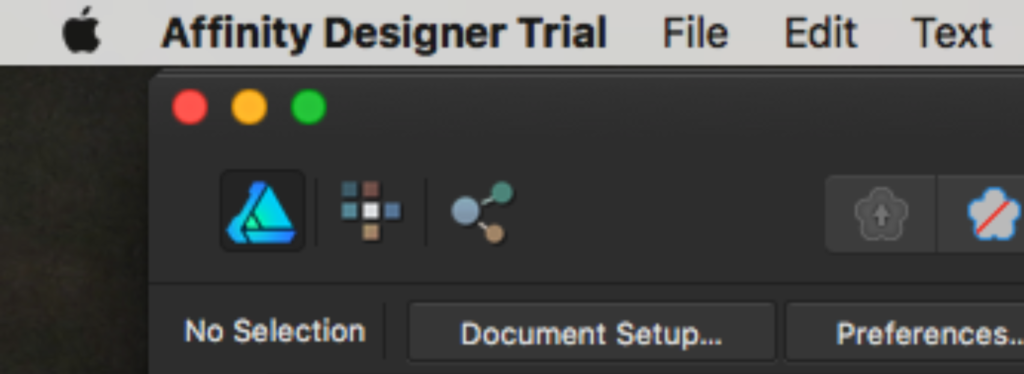
Example of the three Affinity Designer Persona icon buttons.
Draw Persona
This is where all the tools you need to draw or illustrate in a vector environment are housed. Video.
A complete toolbar that Illustrator or CorelDraw users will find familiar. Nothing too fancy here.
Pixel Persona
Here’s where you can create or edit images that are pixel based. Here’s a Video I found comparing Illustrator, Sketch, and Affinity with this tool.
This is great if you design in vector, but are uploading to the web or doing something else. Affinity offers a Retina view, which is something new and needed for a modern online design focus.
Export Persona
Like Affinity Photo, here’s where you go to export files, especially groups or layers within the composition.
My Comment on Affinity Personas
I get it. Personas are set up to differentiate their workflow from the competition.
This could have just been handled by a filter or other toolset. I’d rather have the features be intuitive with how I work, and not something that I’ll have to remember to toggle to later.
But maybe that’s just me being old and cranky. I need to take my hipster pill.
I’m sure that the more I use the Affinity platform, the more I’ll get used to the “Personas” way of working.
It’s a neat idea, but I struggled with remembering to check which Persona I was currently using.
Please, no schizophrenia jokes.
Affinity Photo | Adobe Photoshop Comparison
I’m a career length Photoshop power-user, so it was hard for me to let go and dig into what Affinity Photo has to offer.
But to be honest, there are some things that I love about Affinity that I wish Photoshop resolved a long time ago.
That’s exciting!
Scaling
A positive attribute for Affinity photo is how they handle scaling. When you reduce something, save it, and then enlarge it later there isn’t a loss of quality.
This is helpful when you are playing around with relationships and sizing during the initial layout part of designing. It has an easy to use the info palette tool that shows the data when you adjust the size or even rotation of an object. It has the color numbers, but also the dimensional characteristics, degrees of rotation and placement coordinates.
If you need to make a scaling adjustment back to the original size you can do this easily. Just click a tab over to the History palette and click the slider bar.
I really like this, as I tweak a lot of stuff to get spatial relationships just right.
Just don’t forget to not look for the Scale tool like me. There isn’t one, remember?
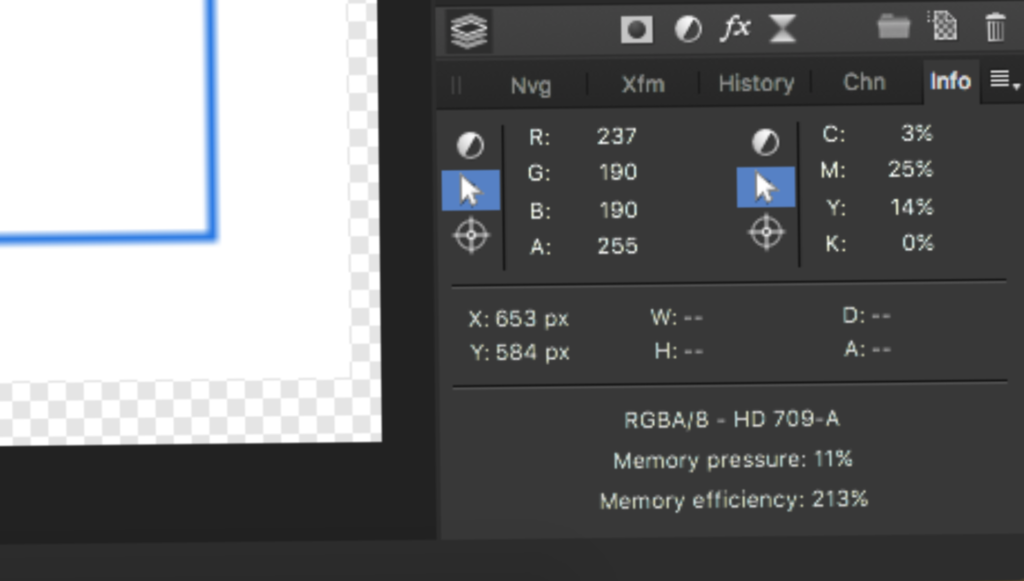
Example of the image info palette. Here’s where the real magic lies.
Filter Layers
Affinity has a nice command of this with a drop down menu that allows you to choose effects to apply to the image. Unlike Photoshop, the filter set ups show live previews to try before committing.
This initially is a separate layer to the image, but you can always merge it to make it permanent.
Using my amazing InkSoft crystal ball, I can see the time suck that this might create for designers that don’t have a real idea of what they want.
A great feature worth mentioning is the Before/After slider bar that shows you the results of the effect before you hit “Apply.” In the example below, you can see that on the two halves of this flower.
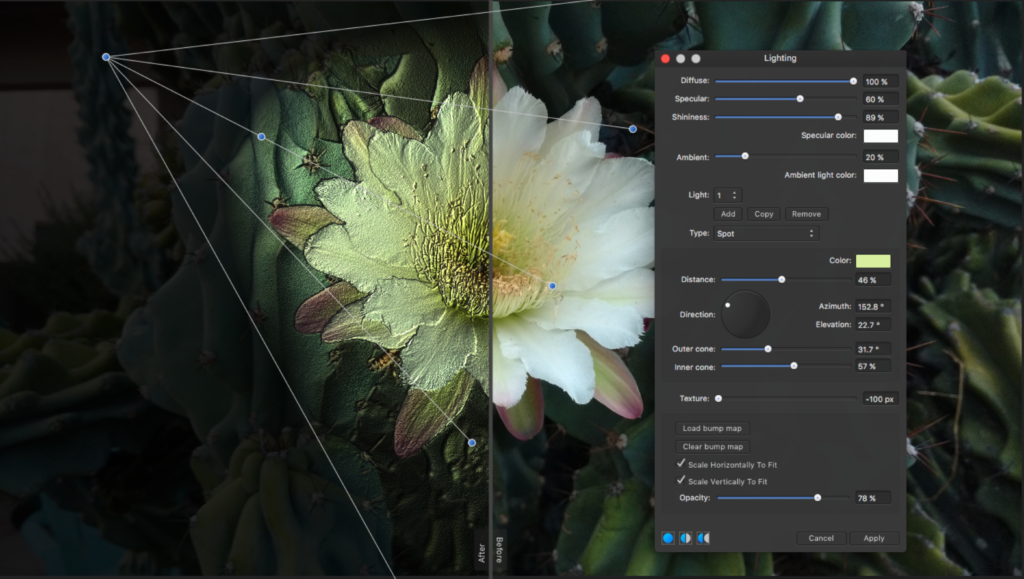
Notice the super handy Before/After slider to preview your selections before applying.
Clouds Becomes Perlin Noise
Many designers, (including me) use Clouds in Photoshop to create textural effects. Applied to backgrounds or objects they make the images more interesting.
It is a staple of Photoshop work.
In Affinity, this is under the Perlin Noise section. Filters>Noise>Perlin Noise.
It works the same, but you have some great control over the effect and can dial in the size and granularity of the noise with a simple to use slider-bar. I love playing with this type of effect, and it works great when you apply it to something.
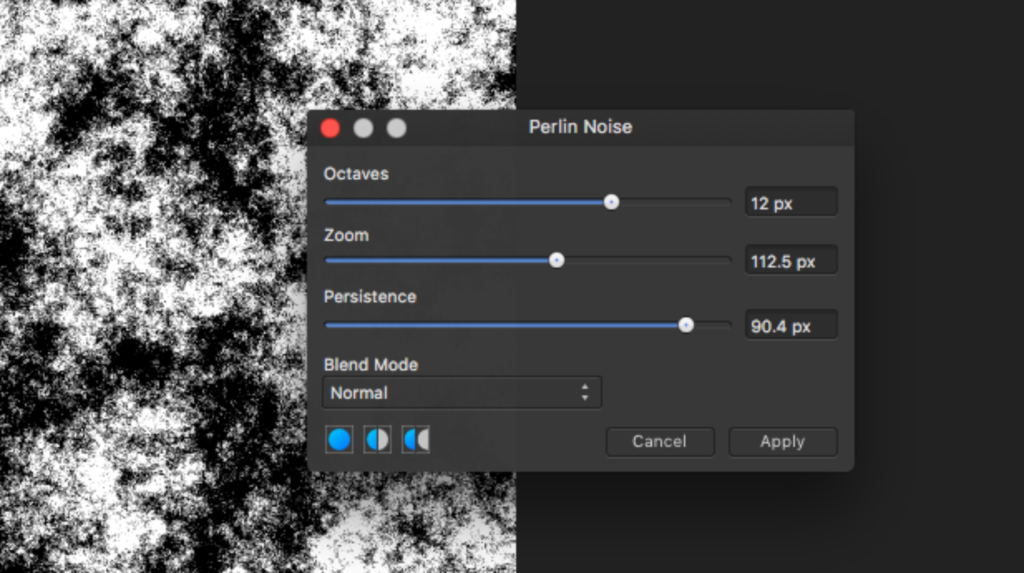
Example of the Perlin Noise Control Palette. Adjusting these sliders affects the image on this layer.
Blur Becomes a Filter Effect
Who hasn’t used a Gaussian Blur to help create effective drop shadows, interesting type effects or other uses to objects in the design?
Gaussian Blur is probably one of my favorite tools to use in Photoshop, and I was interested to see how Affinity is handling that.
To use this, you just simply click on the “Layer Effect” area and choose Gaussian Blur. Like other tools in Affinity, you can see a live preview with a slider bar to dial in the result.
There also is a “Preserve Alpha” check box, that when selected allows the blur to happen but it doesn’t leak beyond the edges of the image. Want to blur stuff inside of a shape? This is how you do it easily.
Bingo.
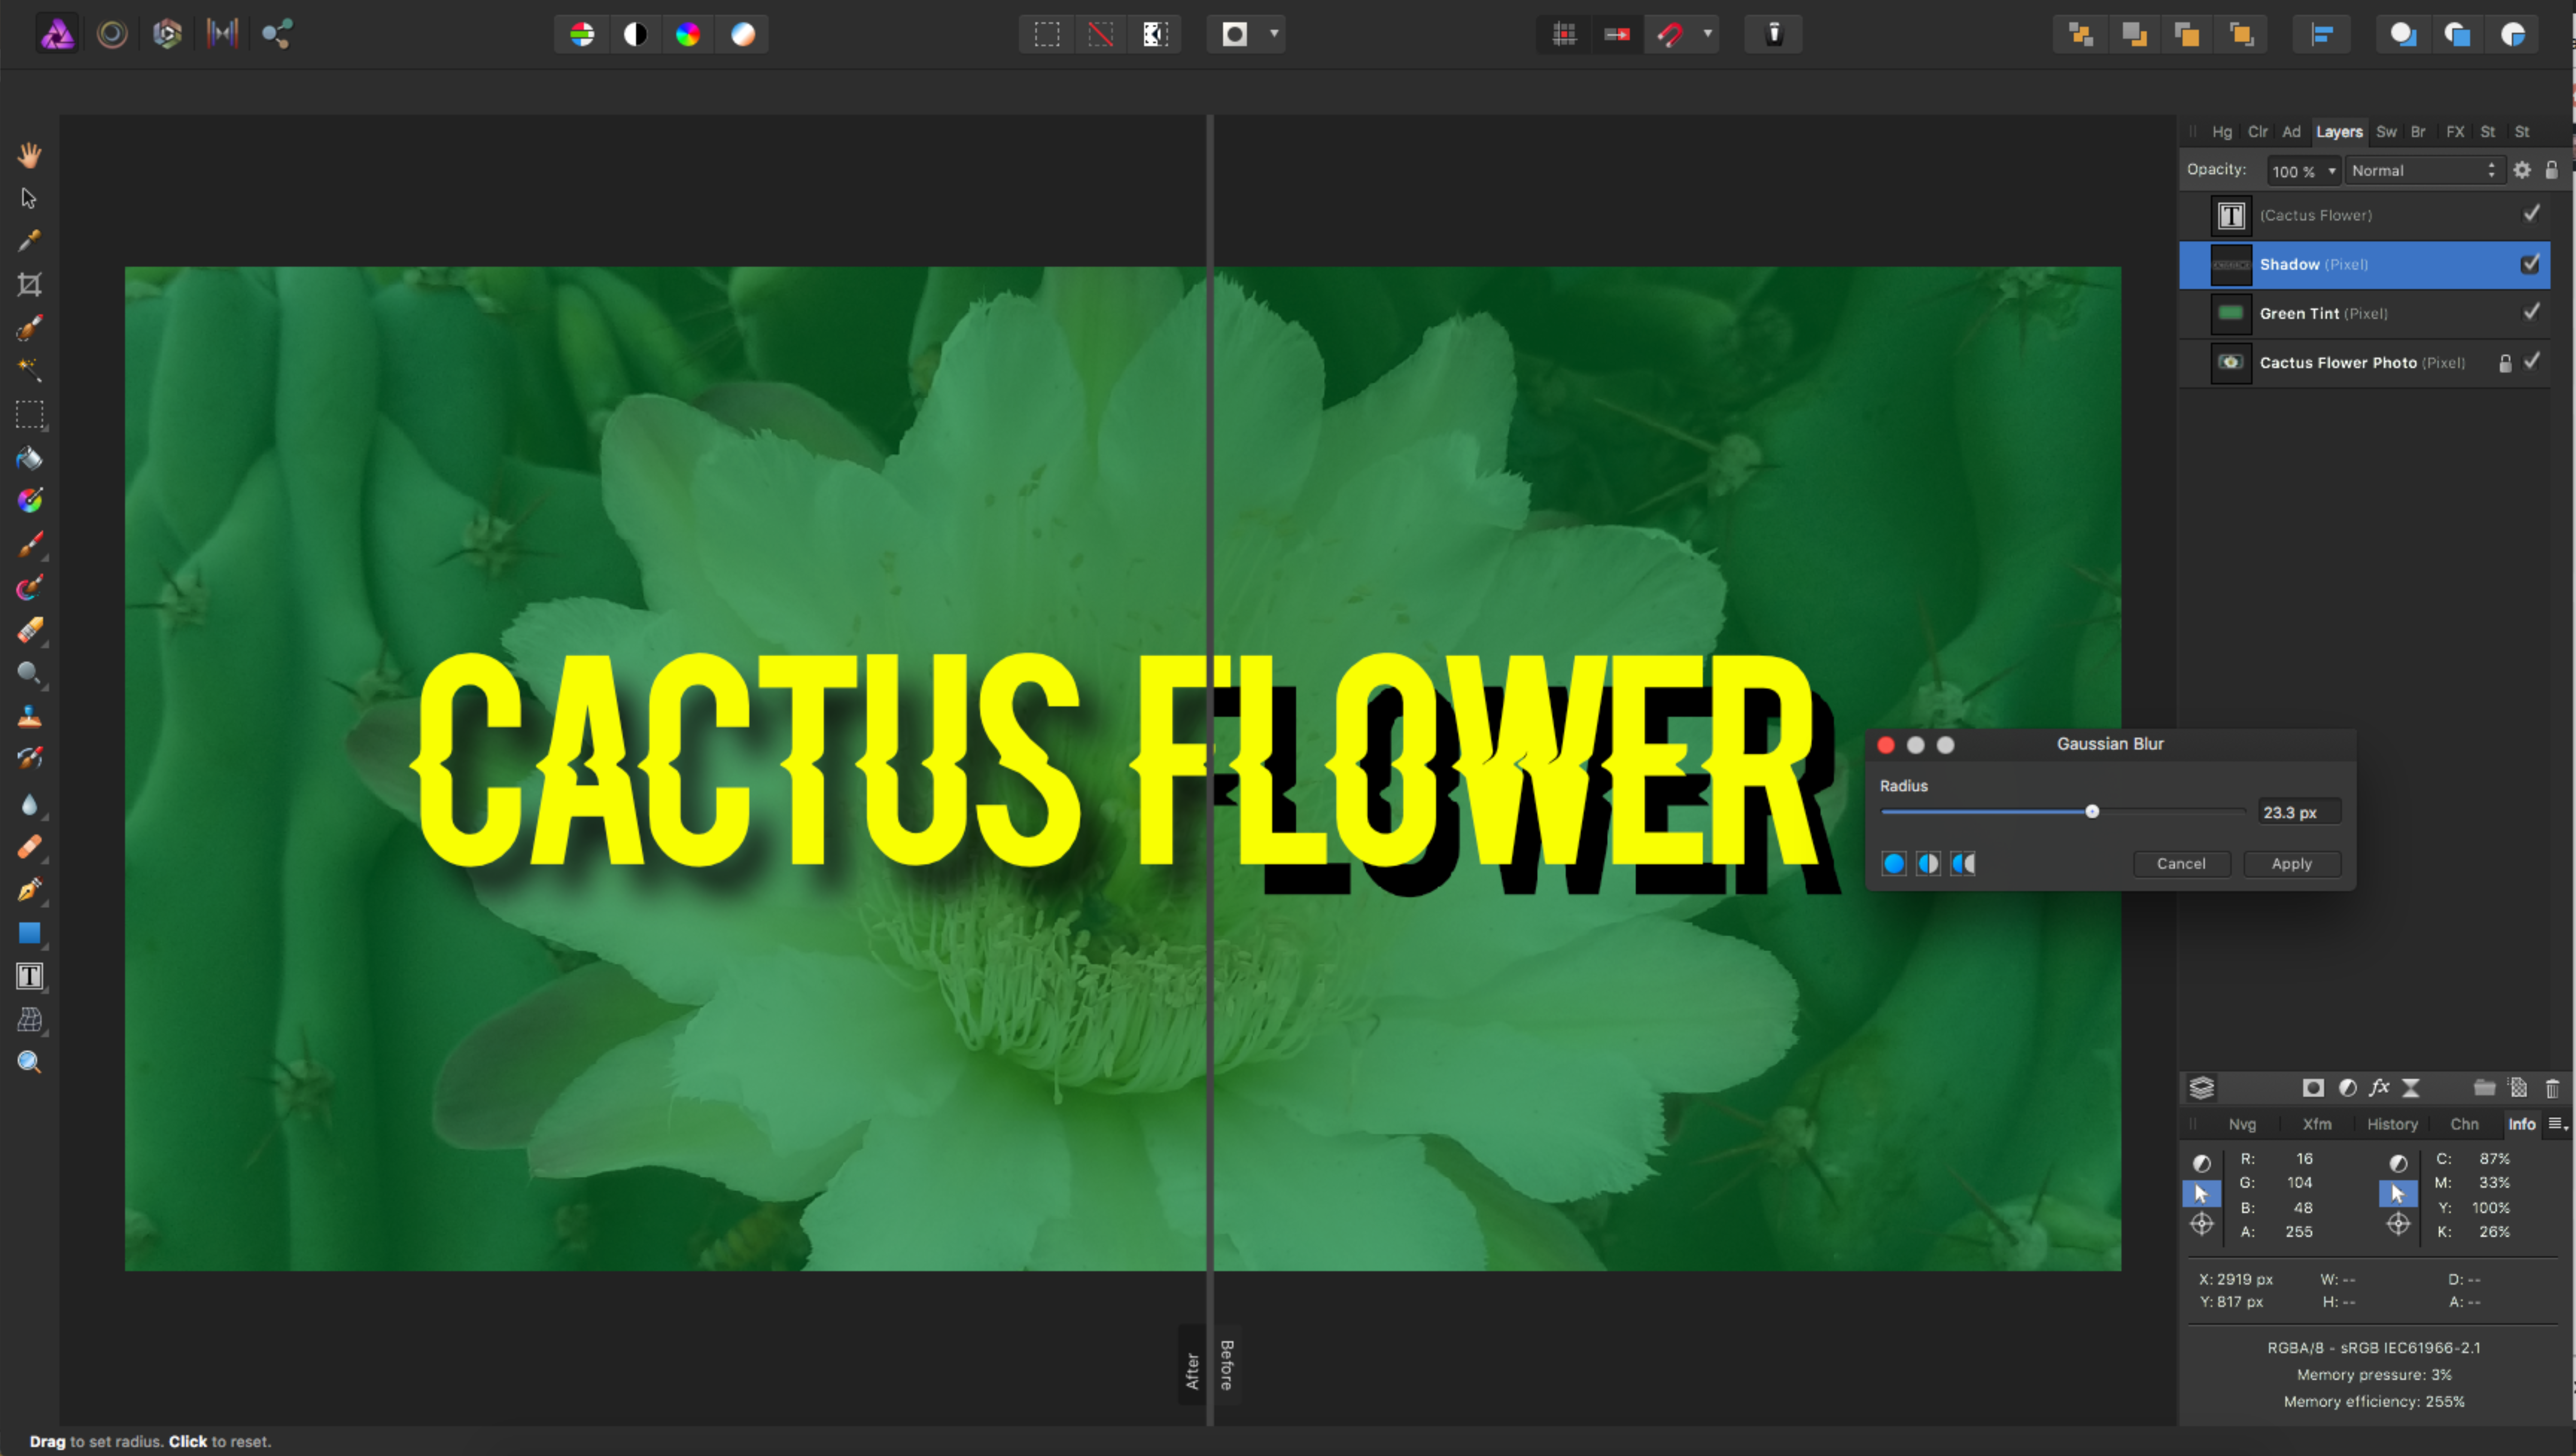
Nice control of the text drop shadow with the Gaussian Blur feature. Notice the use of the Before/After slider.
What Works Better in Affinity Photo
I hate to admit it, as I’m a big fan of Photoshop but there are some areas where Affinity might win the argument.
For example, Photoshop limits users to only 20 levels of undo. Maybe you want to expand that? Affinity gives you over 8,000+ levels.
That’s a lot of undoing. I don’t think I’ve ever wanted to undo more than 753 steps.
Just kidding. I’m like you. One or two at the most usually.
I also like that when you use masks or layers, Affinity gives you live previews with a handy Before/After slider bar. So when you are messing around you can see in real-time what the result will be to the image. Photoshop sometimes makes you choose and then it shows you the render after the fact.
This feature dominates all aspects in Affinity, and I’ve shown it in multiple examples for this article.
See below on how an Unsharp Mask filter looks on the left or right side of the image.
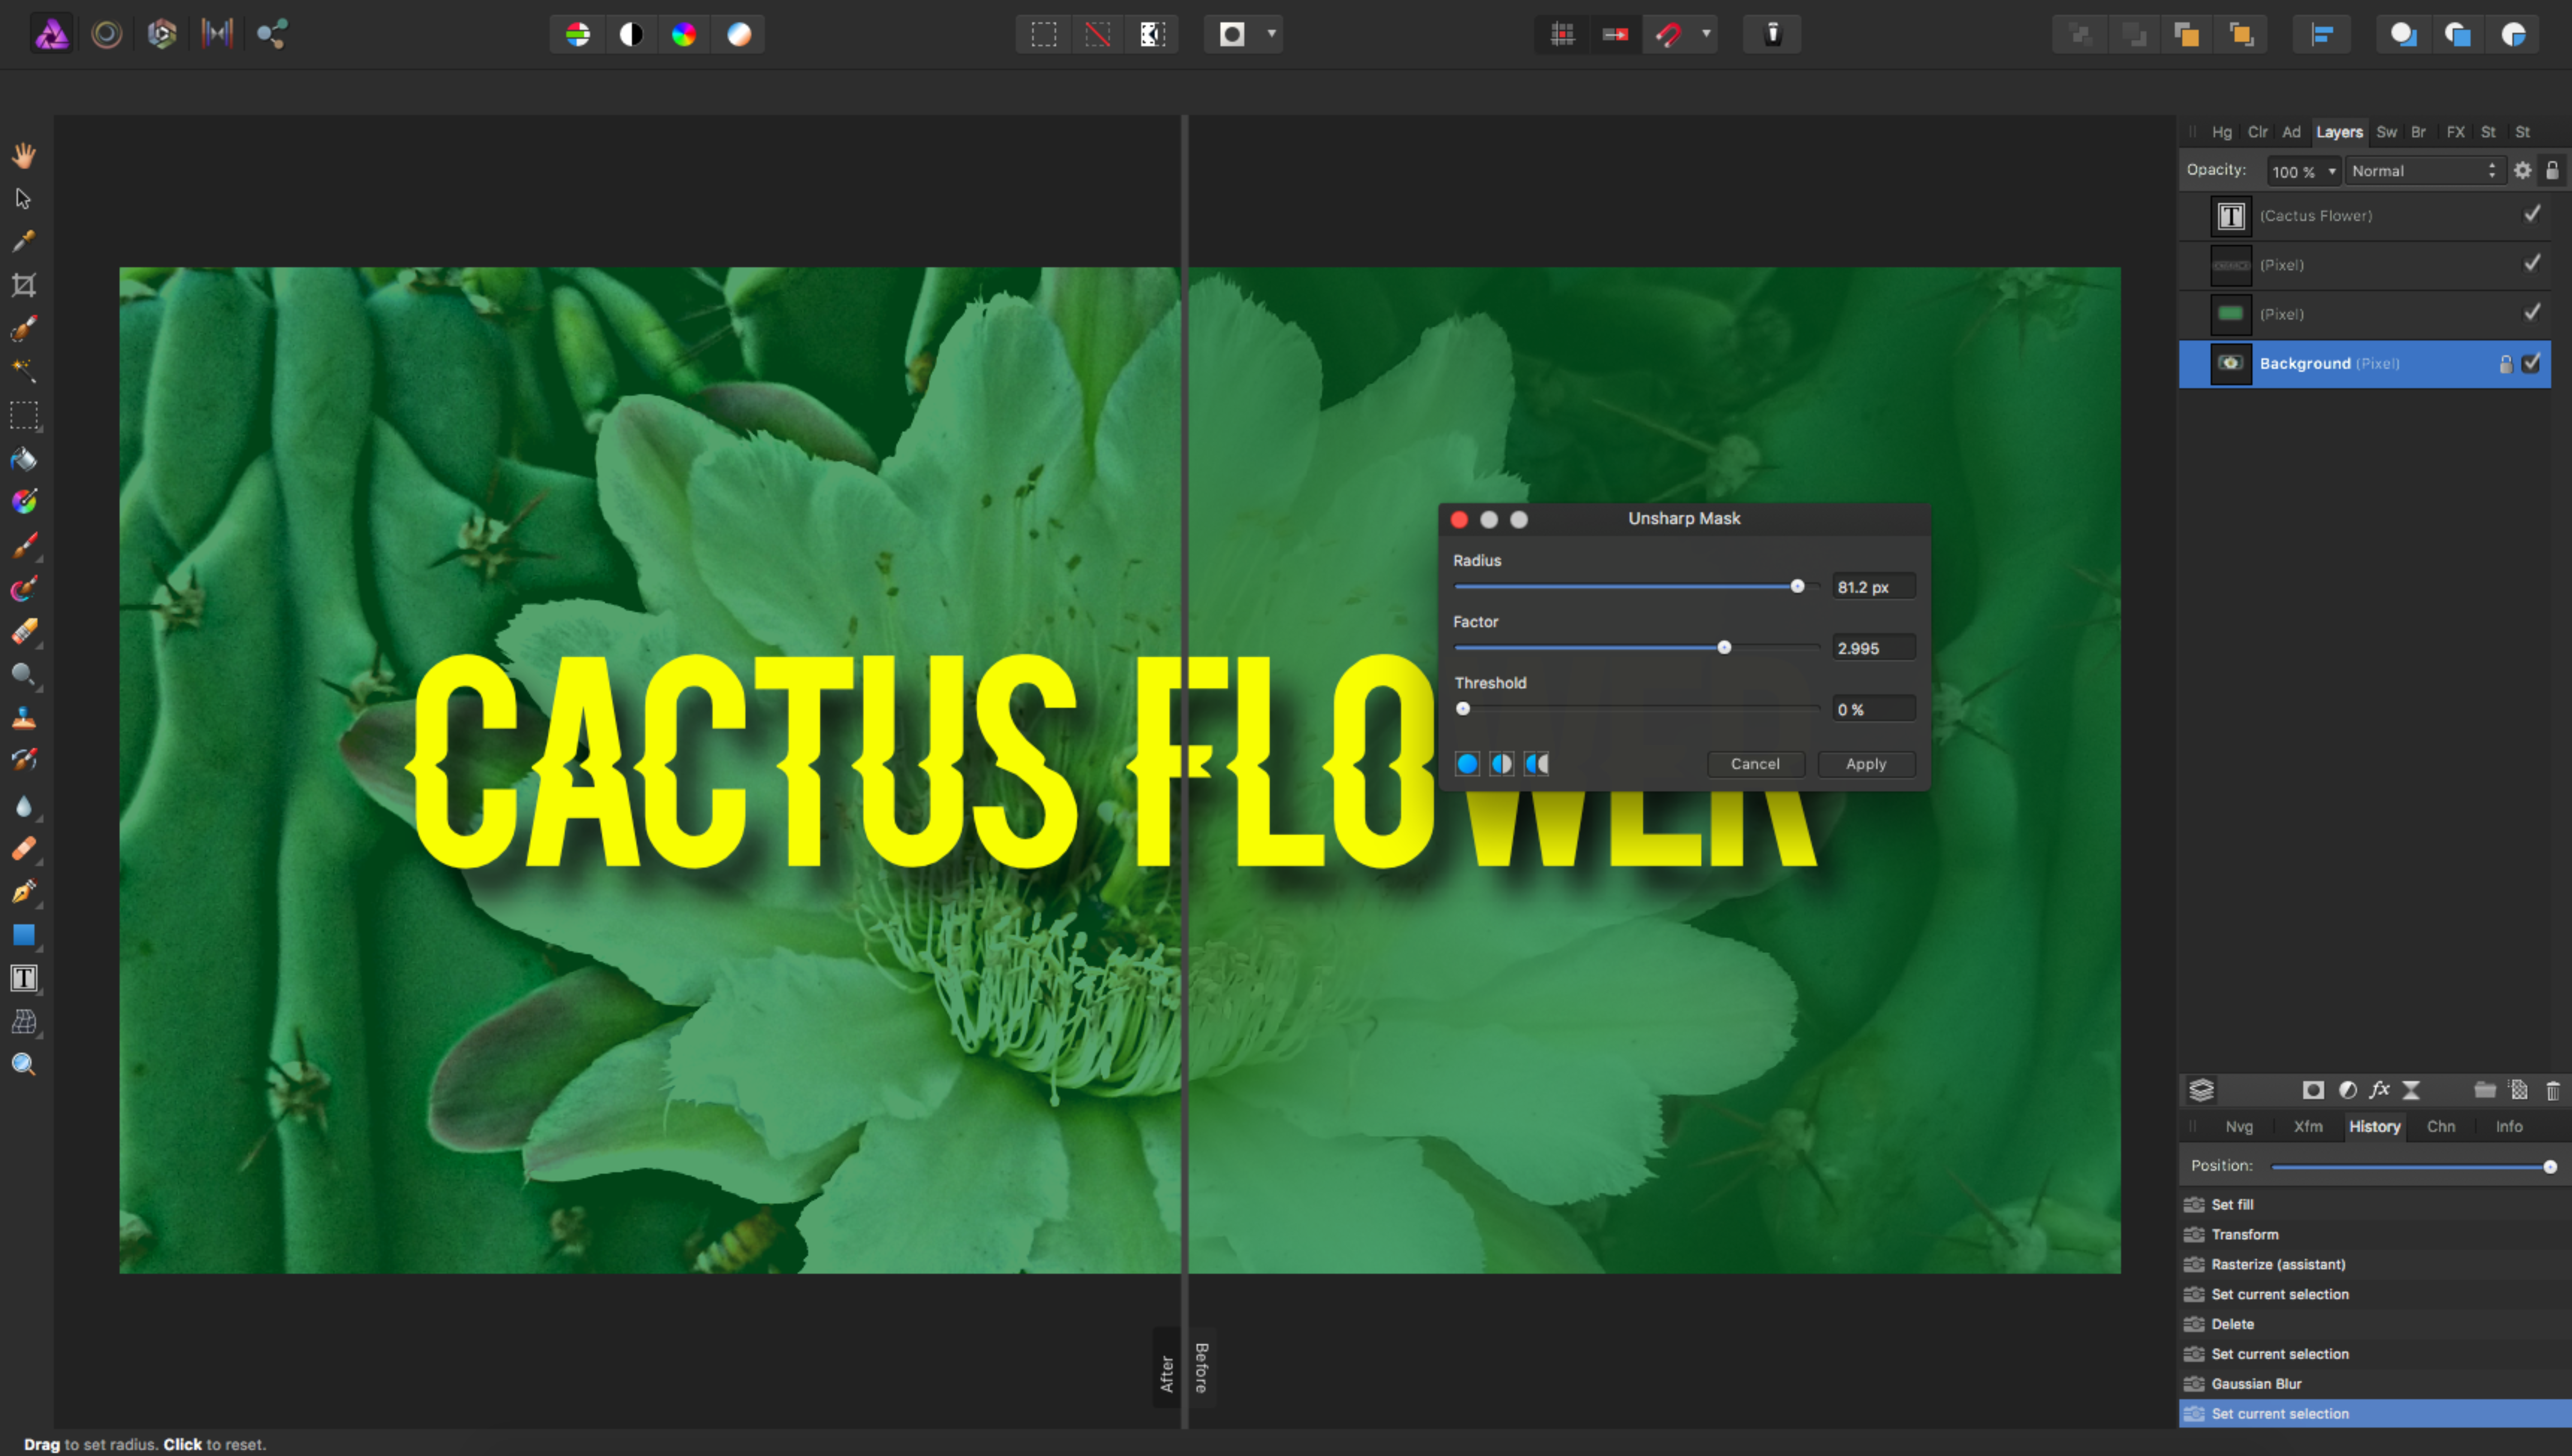
Use the Before/After feature to get a live preview of exactly how your selection will look on your image.
Affinity Photo Paths Tool
It was very easy to use the Affinity Selection Brush Tool. A control palette has a good interface to dial in your selection. Feather, brush size and other tools have a slider to adjust the amount of control you need. At the top of the palette is also a selection pull down where you can view the image with different overlays.
Designers that use a heavy amount of masks from selecting areas will find some good comfort and control with how Affinity works.
It’s simple.
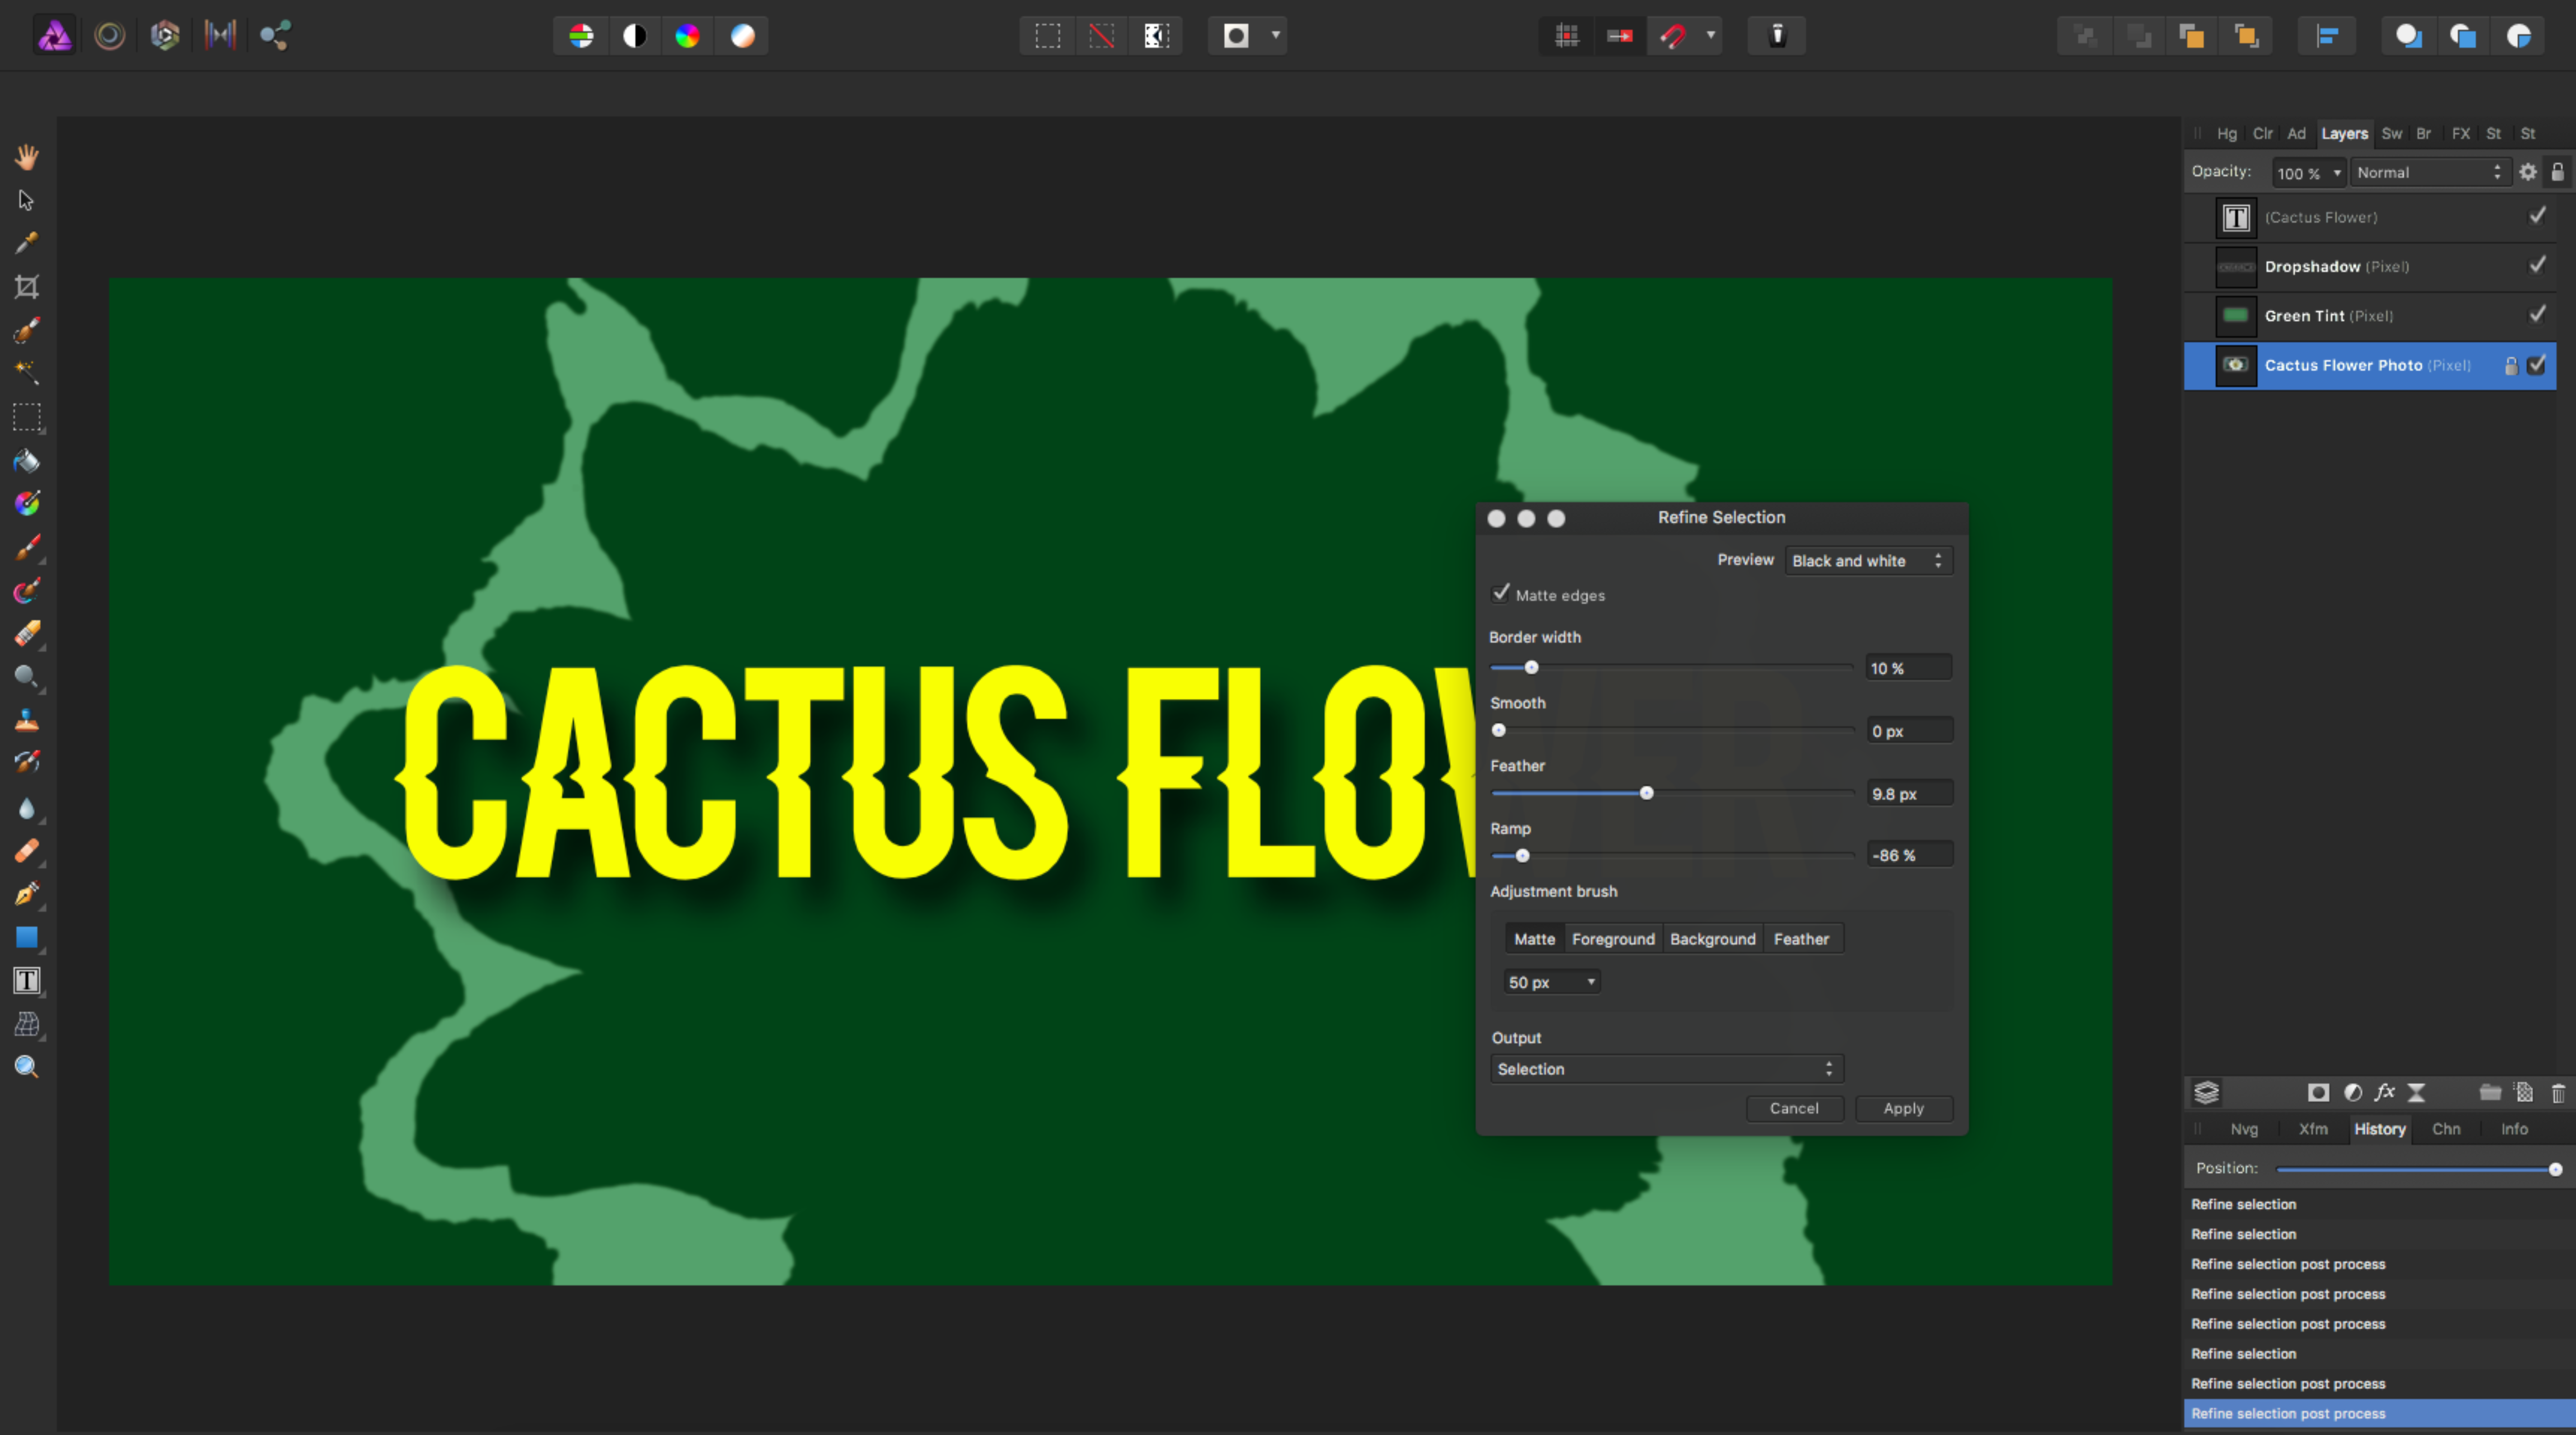
Affinity Selection Tool with the Black and White Preview mode on.
Affinity Designer | Adobe Illustrator Comparison
Buckle up!
As I’ll bet most designers work in Illustrator more than Photoshop this could be a drastic workflow change if you switch. Video.
Like Affinity Photo, you can open Illustrator files without many problems. You may have some challenges with certain aspects, such as when the Illustrator file has parts of the image bleeding off of the canvas.
With Affinity, it will just delete anything hanging over the canvas area.
Red Nodes on Objects
We all know how to select and drag points and handles to customize object shapes in Illustrator to make the perfect object in our files. In Affinity, there is a special Red Node for standard shapes. This can be selected and dragged around to change the object’s appearance.
It’s automagic shape construction.
In the pic below, to simultaneously change the dimensions of the arms of this shape you’d only have to click and drag one thing. The Red Node. The green highlight shows that the “leg” is in a proportion of a perfect square.
Super nice.
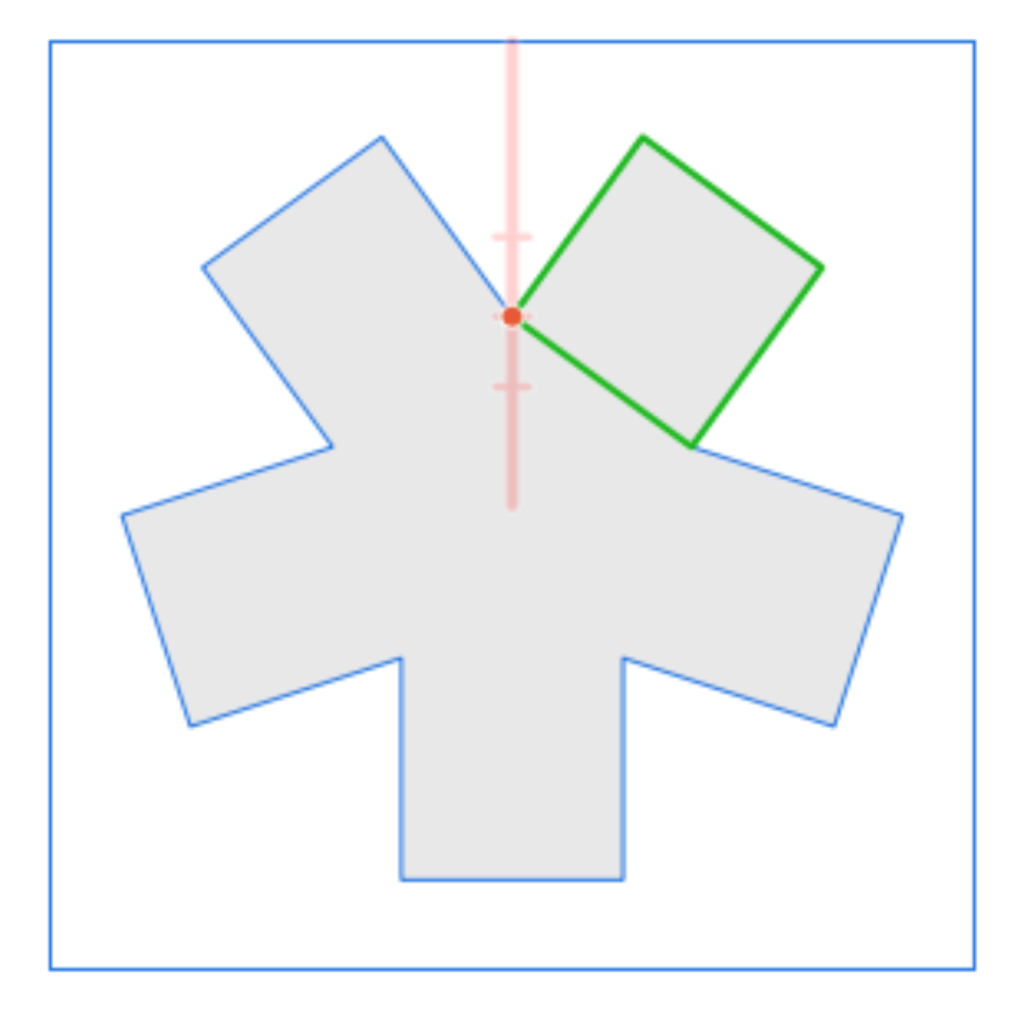
Example of a Red Node in action for configuring a shape in Affinity Designer
Intuitive Views and Additions
What’s great is how Affinity updates the organizational strategy within the file.
For example, if you add a new element to your files, such as an object or a line of text. Affinity auto adds a new Layer for that element and shows the appearance of on that item in the Layers section. This is a great feature when you have a lot of objects or items on the file.
In Illustrator, when you add a new element or object, if you want it on a new Layer you have to create that and apply it to the layer. In the example below, I chose the “A” type button on the far left and simply typed the number 8. The type layer was automatically added and highlighted on the far right info palette.
Boom.
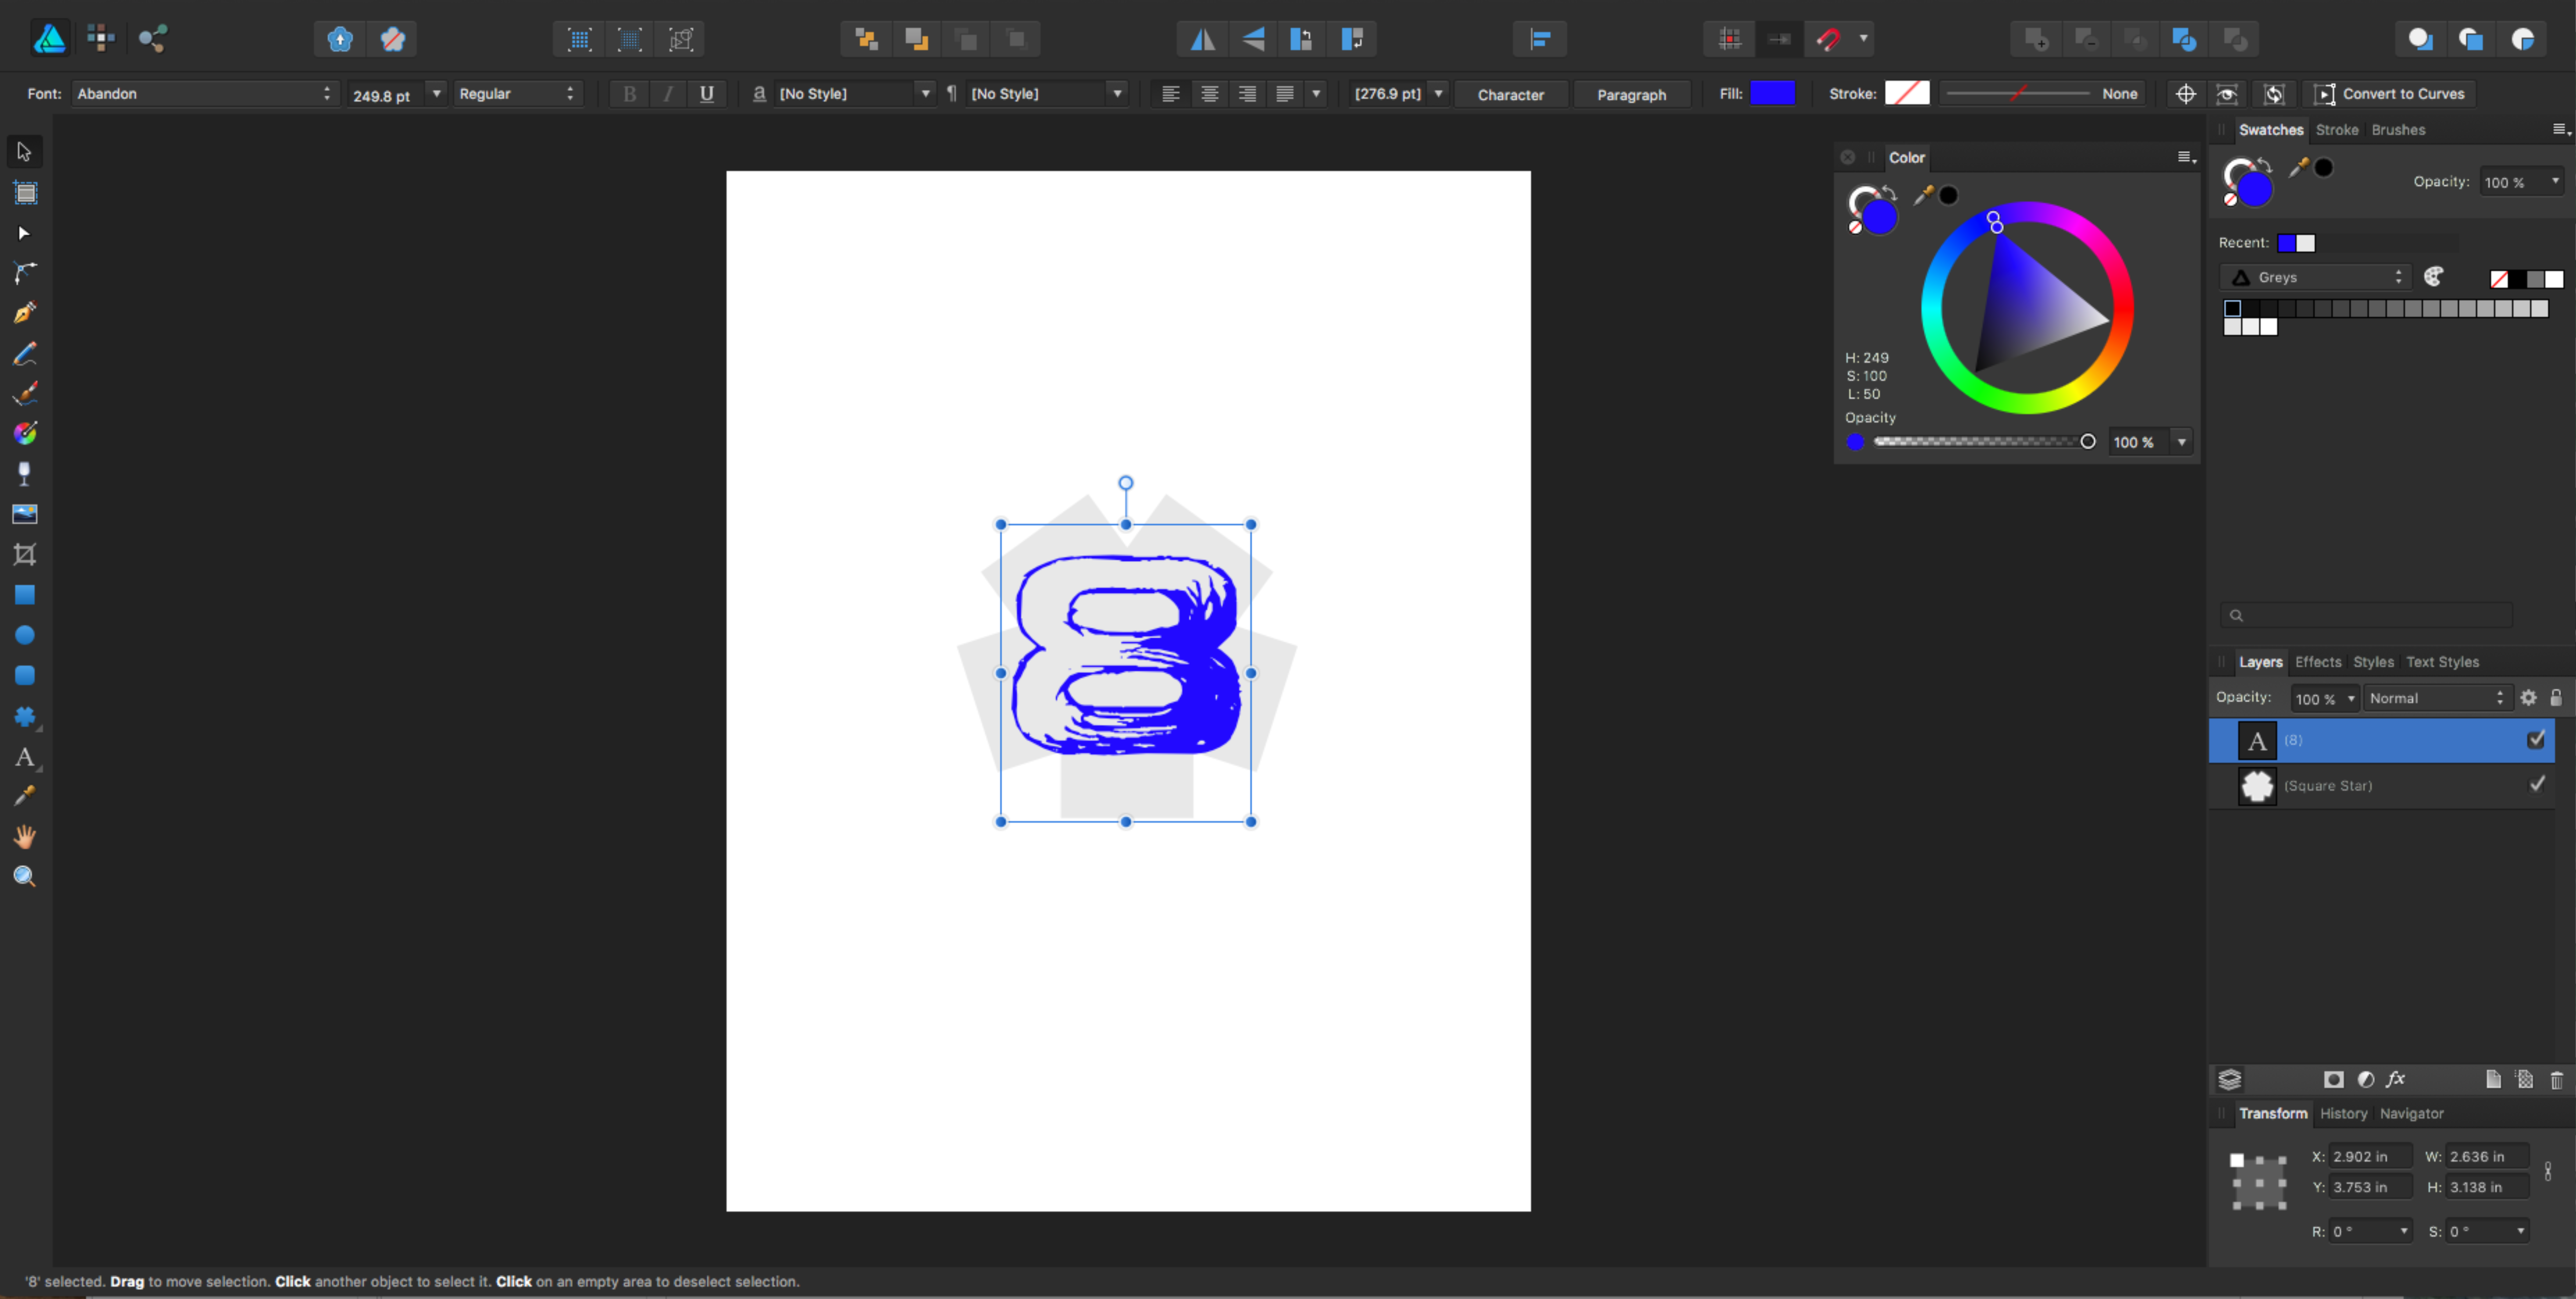
When you add something new in Affinity Designer, it automatically creates a new layer for you.
Convert to Curves
This is a staple of working with type styles, and Affinity handles this work with a good interface. It is easy to use and pushes the next steps for you automatically. Video.
I like the simple accessibility of the tools, and it makes customization of letter shapes simple and quick. This should be one of the first things you test and play with, as creative use of text is a common theme in most graphic needs for orders.
Plus, you aren’t one of those people that will send files with fonts not converted, right?
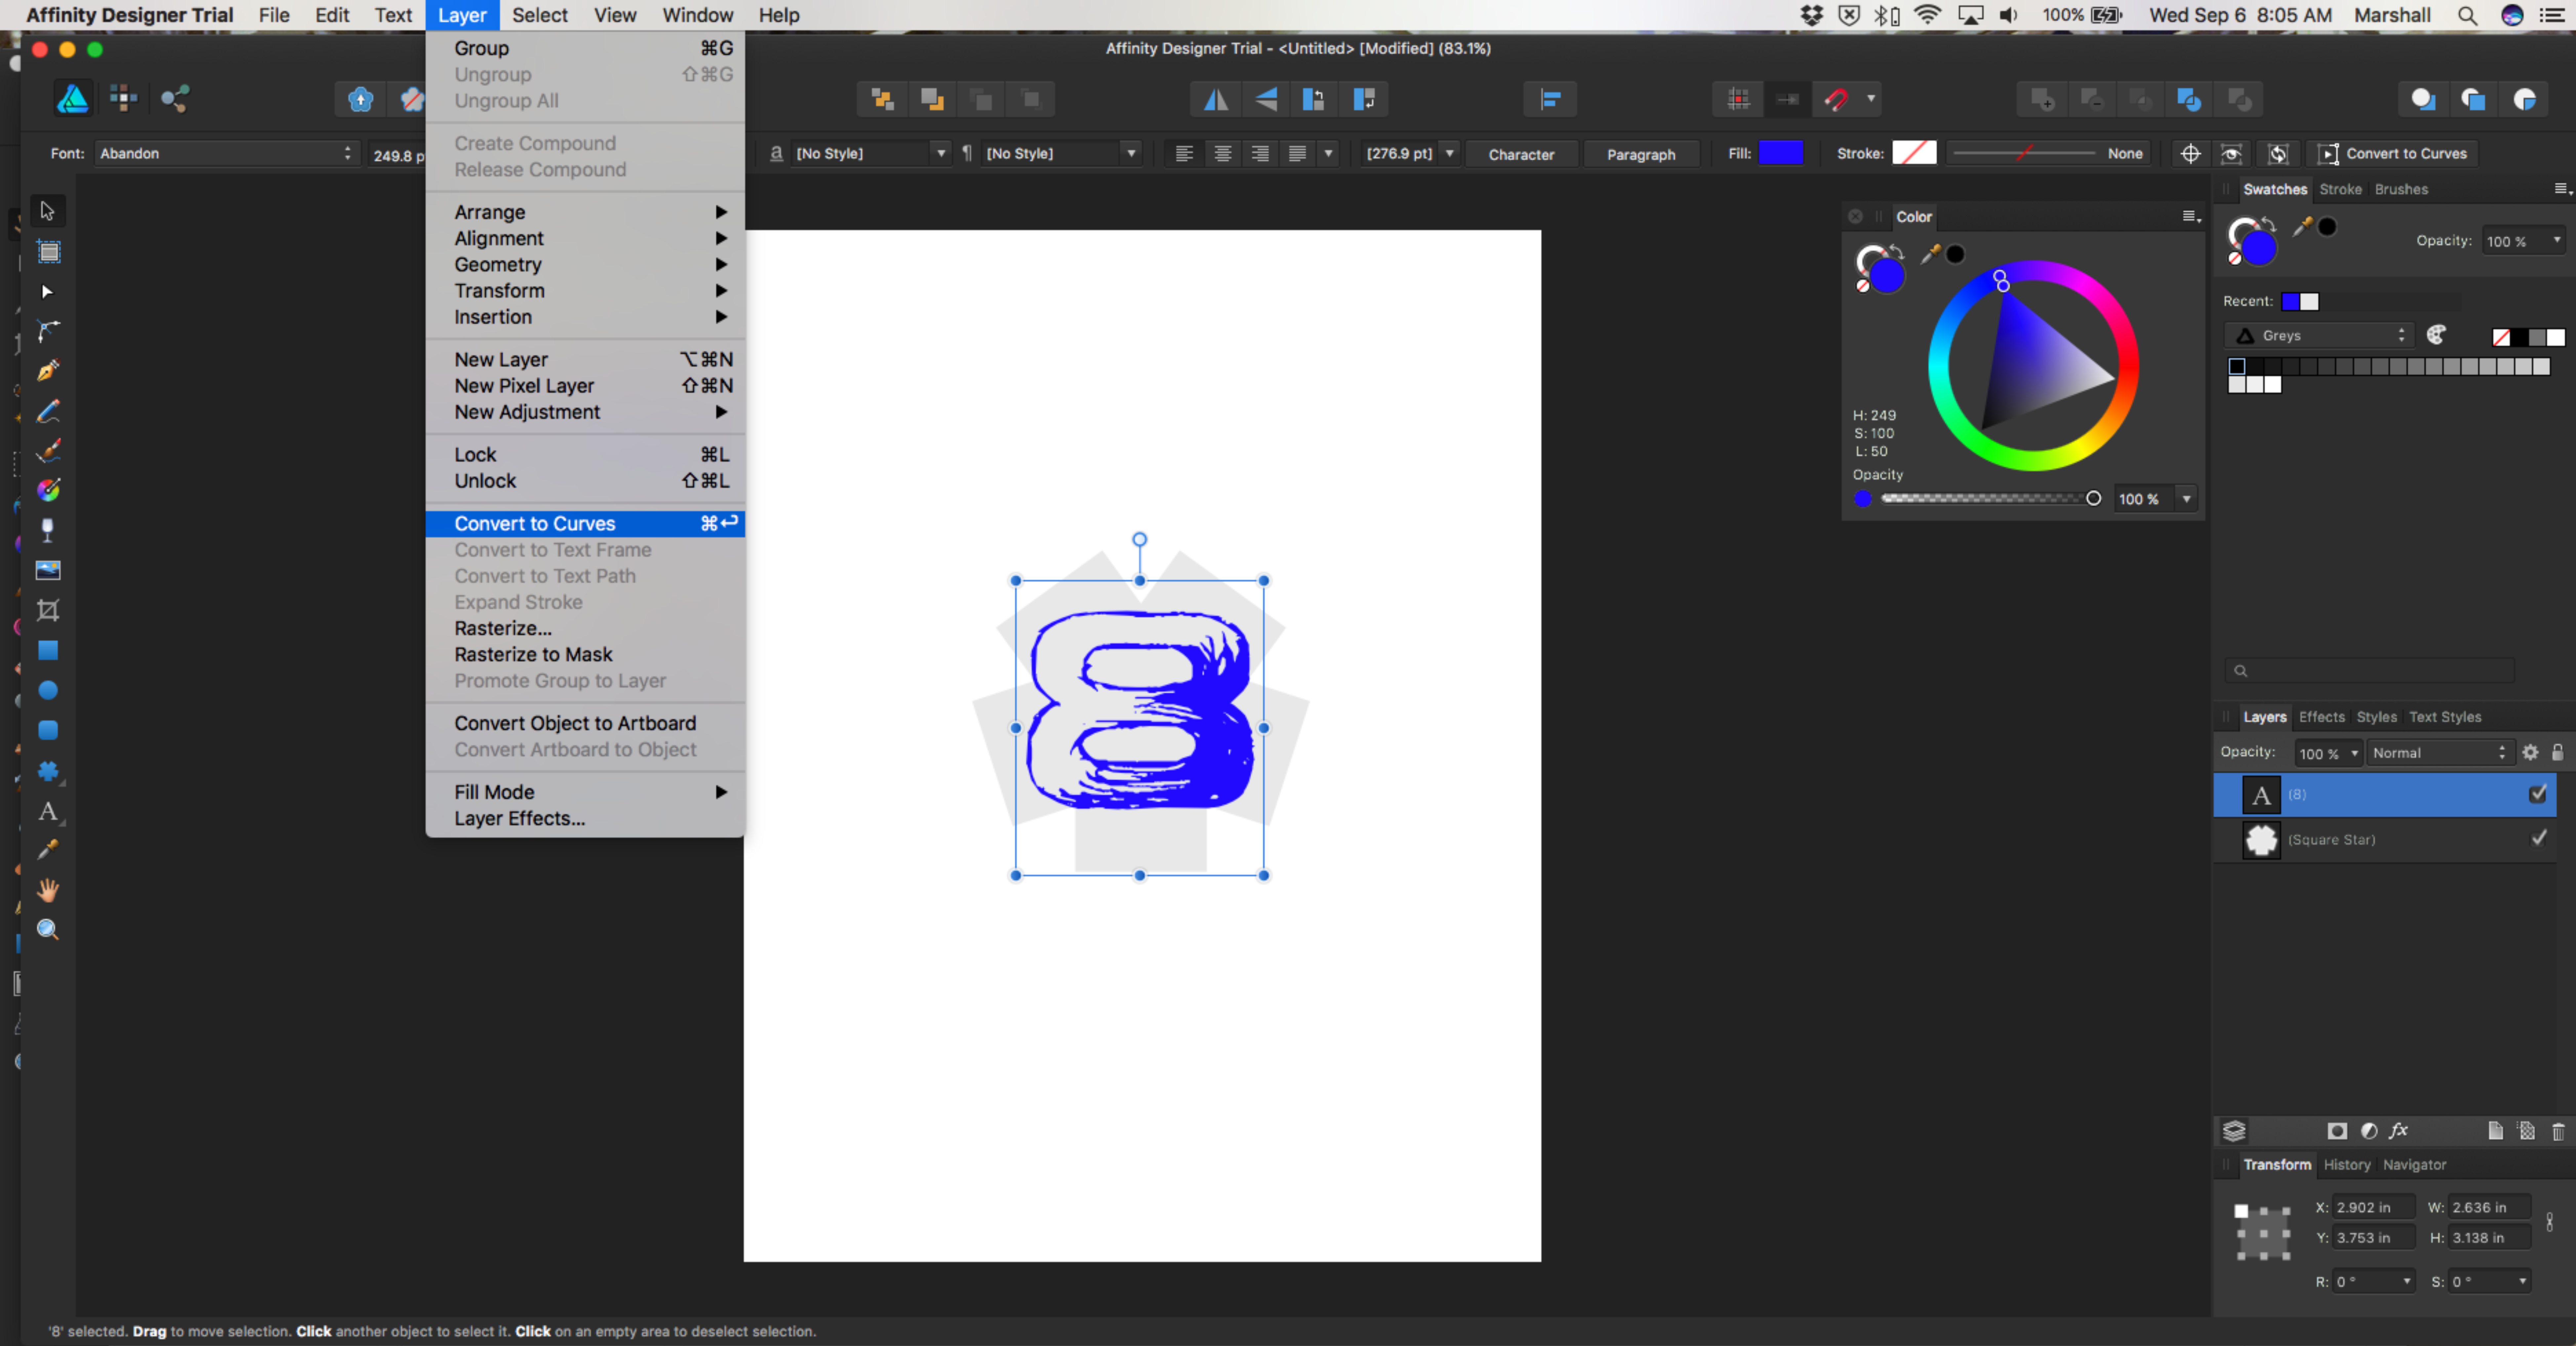
Under the Layer drop-down is the “Convert to Curves” command to change your type style to a vector shape.
Effects
Like Affinity Photo, the Affinity Designer platform comes full of commonly used effects that any creative mind will appreciate. They live in the Effects tab, and all you need to do is select an object and click around to try them.
In our example, we’ve already converted the 8 to a vector shape, so let’s give it a quick drop shadow with the Gaussian Blur effect. What’s fun here is that you can offset the effect and the opacity in one spot. Even the angle. The control is one location and it is just a matter of dialing in what you want.
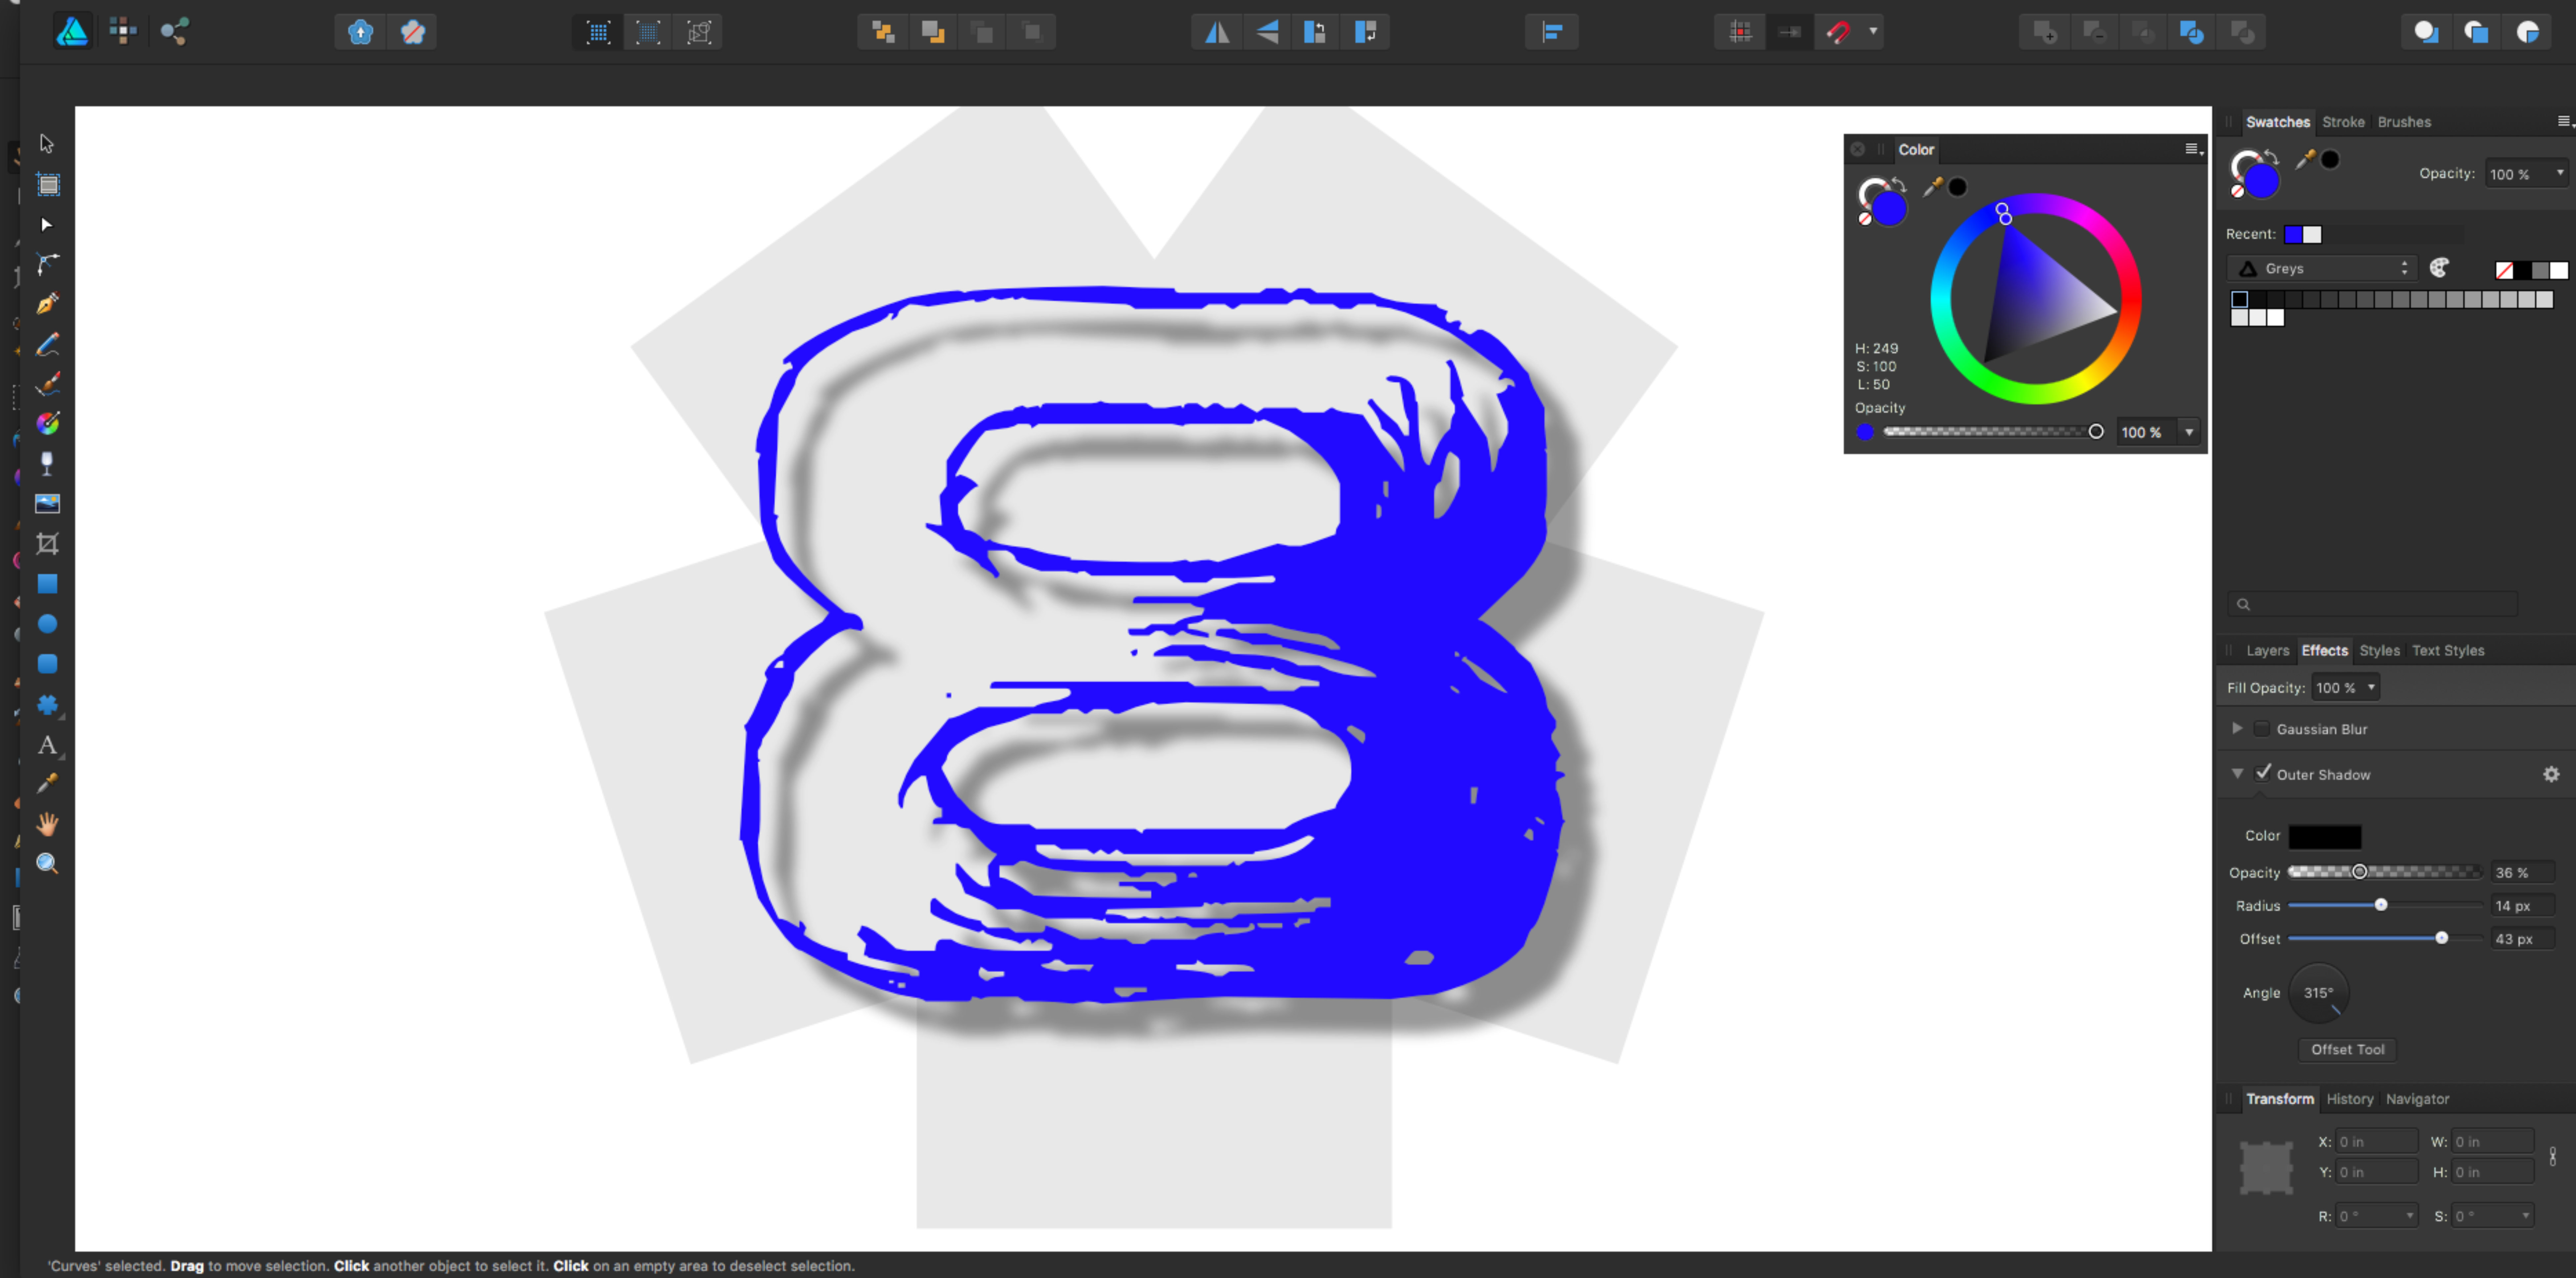
Instant drop shadow for an object. Full control in Affinity Effects tab.
Verdict
So, the big elephant in the room is “will this work for our industry”? In the decorated apparel industry, we’re a picky bunch.
Moving to Affinity could be a way to handle the creative workload at a lower operational cost. Once you buy Affinity, you’ve spent your money. No more monthly subscription fees.
That’s a highly attractive reason to start learning this program.
But there isn’t a way for me to determine if Affinity print files will work with the printer and RIP software installed in your actual shop. There are just too many variables there.
The only way to know is to just take the plunge.
Here’s what I did try to test:
Will Affinity Photo split channels to create simulated process separations?
I learned the old school way to create simulated process separations in Photoshop with using Channels to create spot color selections for each ink color that was needed. With Affinity Photo, this was not possible as you can not edit the channels, only layers.
In Photoshop, I like to convert the file to LAB and use the L channel as a good starting point for the Underbase White. I use the Color Range tool to grab the color needed and build my spot colors in each Channel. Then, I’ll split the Channels and print each one as a screen.
As you can’t edit Channels with Affinity Photo, these steps can’t be achieved for me.
Insert sad clown face here.
Can I have control of halftone dots with size, shape, and angle?
Not yet.
This is sorely needed for Affinity to really dominate. Currently, these programs are used for creating images, but in terms of having control on the output, there isn’t much there.
In the Affinity discussion groups, there are some hints that they may be working on this, but nothing is available at this time.
Here’s the link if you want to wade through it.
Will Affinity Photo or Designer use fonts I have loaded on my computer?
You bet. I am using a MacBook, and the fonts I have loaded worked perfectly in both Affinity Photo or Affinity Designer without a hitch.
What about PMS colors?
Both programs support Pantone colors and have a good selection tool for using them. No worries.
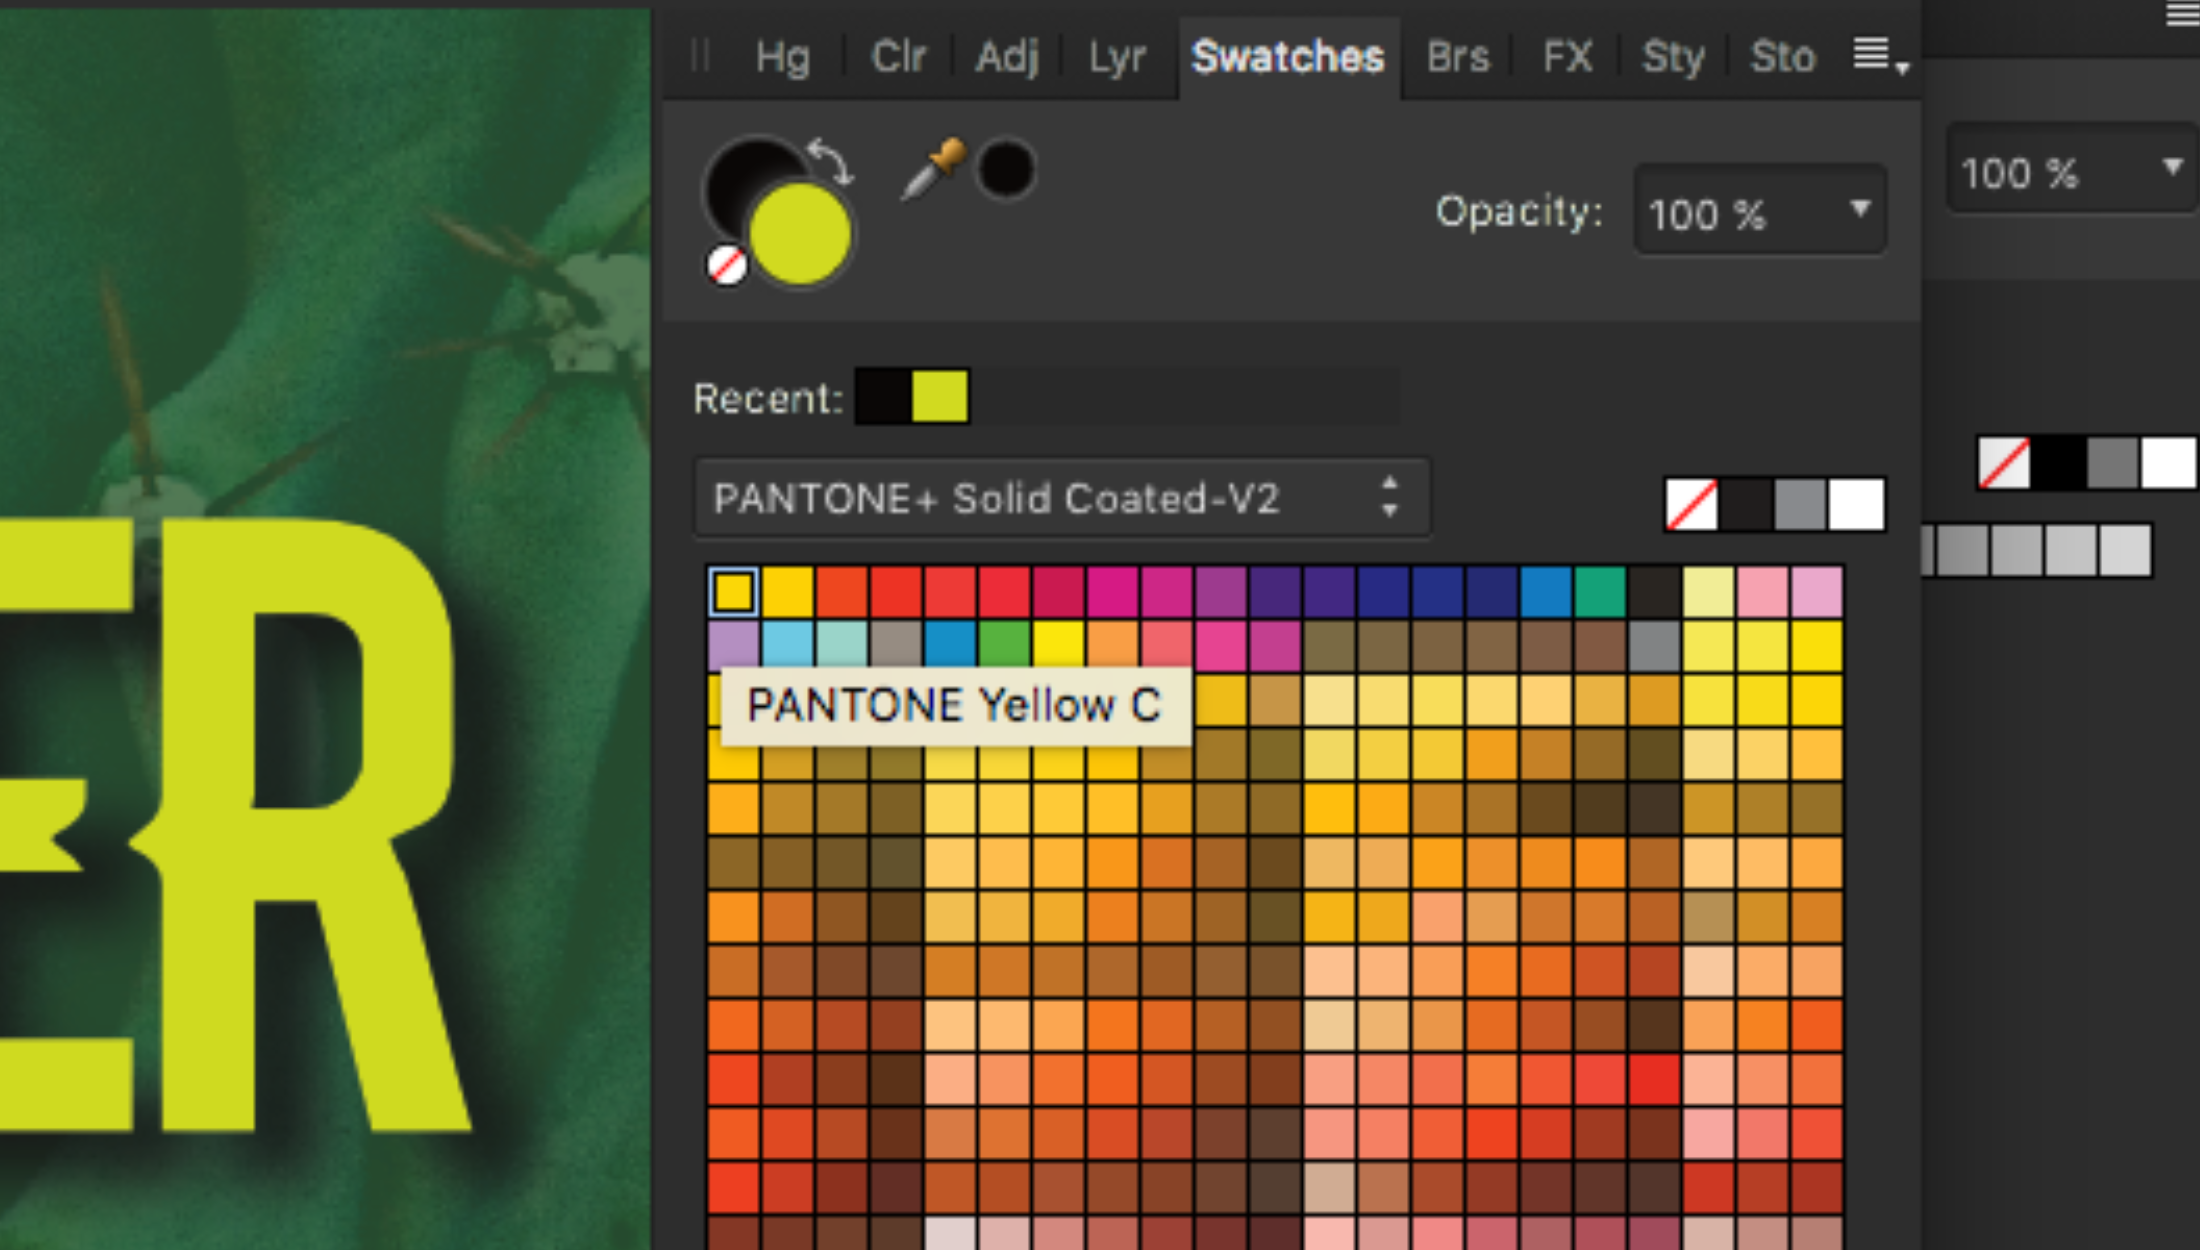
Pantone Color section tool in Affinity Photo
Could colors be renamed, such as “Underbase White”?
Yes.
In fact, you can create a custom palette for your shop, which could be useful if you want to load all of the stock ink colors you use all the time. You can rename the color swatches whatever you want as well. Underbase White, White with 50% Curable Reducer, Top White, or whatever you wish…
In this example, I renamed the Color Palette and also the label for the red color swatch “Super Awesome Custom Color.”
It’s as easy as selecting the box, and then just clicking Option to load a floating info palette with the renamed feature.
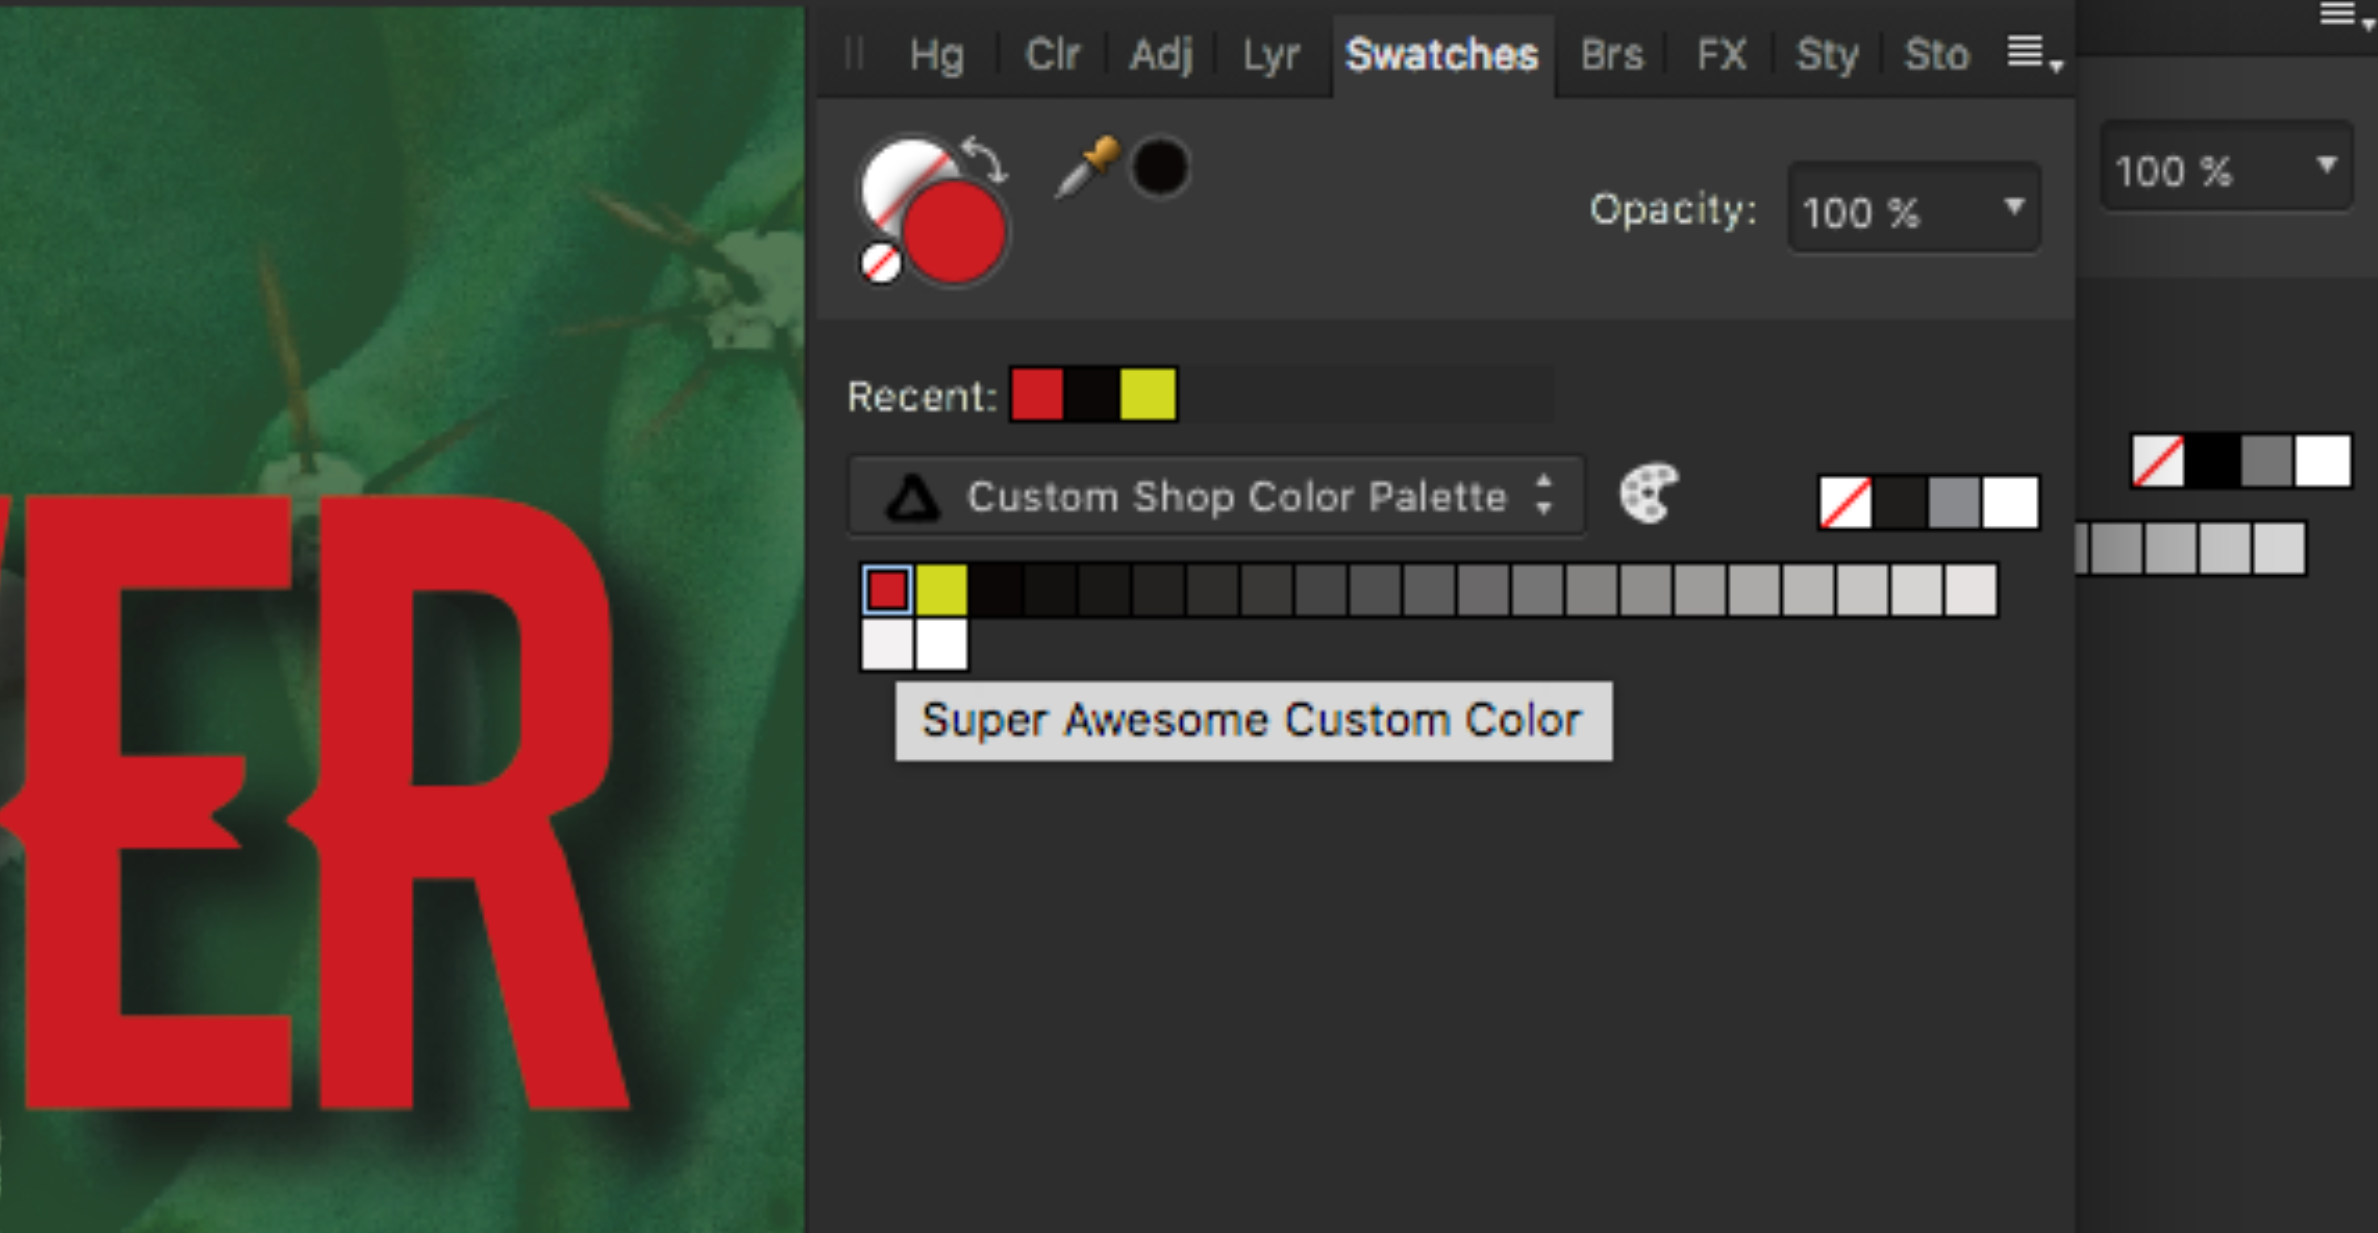
You can rename Color Swatches easily.
Can I create a distressed texture and apply it to a design?
Of course.
For this example, I created a Perlin Noise texture as a new layer and set it as a Color Burn with 77% opacity that covered the entire design.
A piece of cake and about a minute’s worth of work.
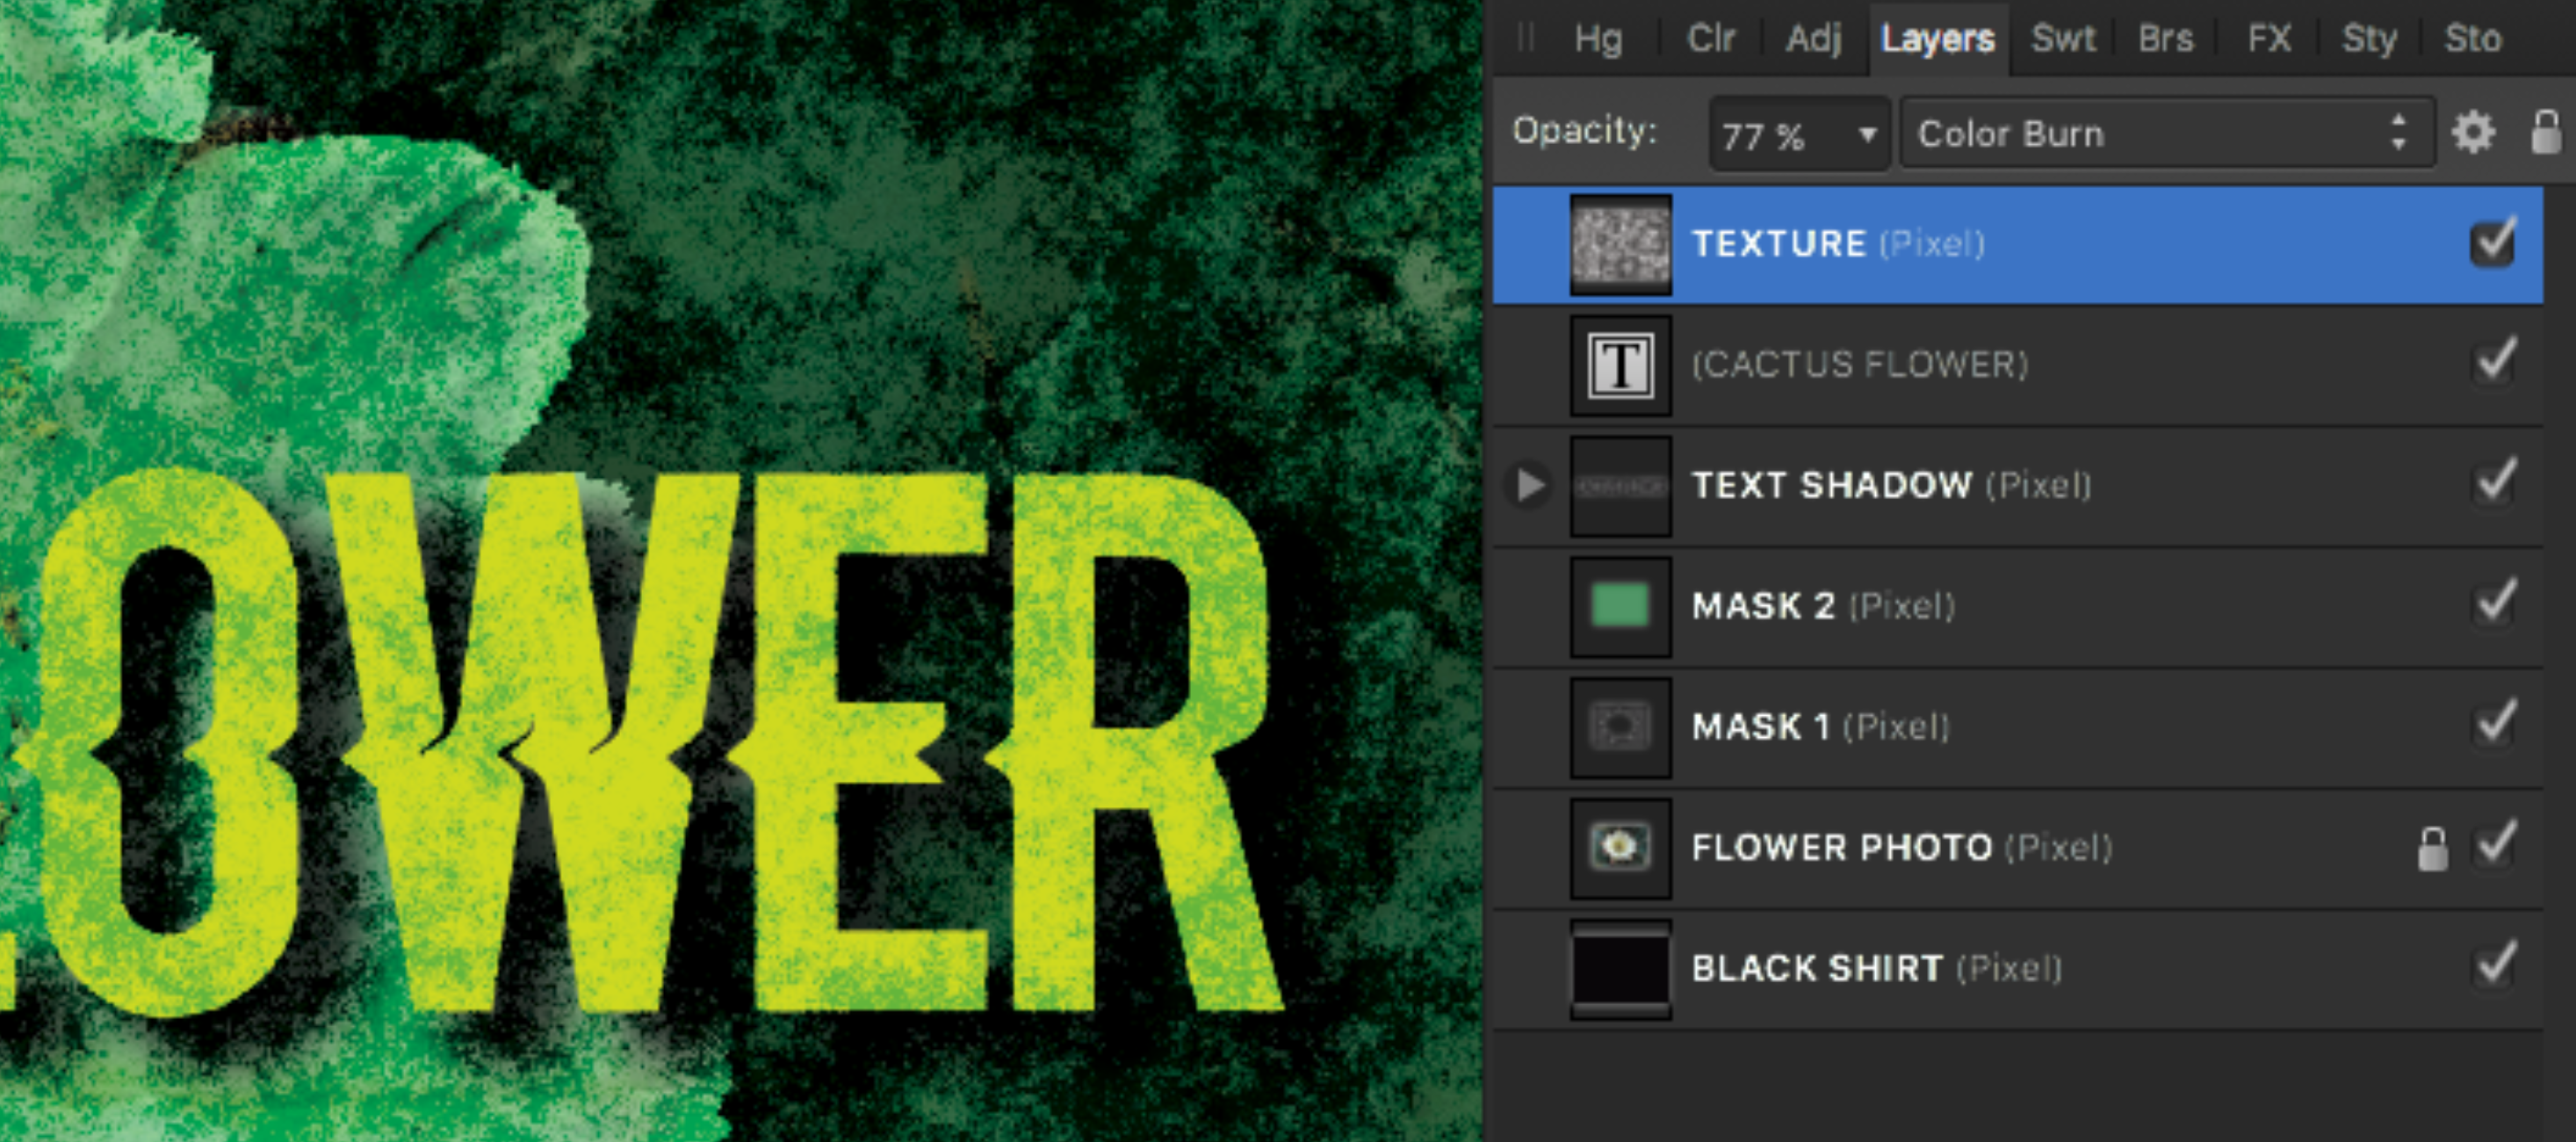
Create your own textures!
Final Thoughts on Affinity
To me, this software is inexpensive enough to buy it and try it and see if it is a platform that has long term legs in your shop.
Based on the comments in the online community, they are working on new developments to resolve some of the biggest challenges. I think adding some prepress controls and being able to edit Channels would be a big help to our industry.
Some fun stuff and definitely worth the money.
I would love to hear real opinions from industry art departments in the comments section!
Let’s spread some knowledge!
.
“Do or do not. There is no try.” – Yoda
“If you think nobody cares about you try missing a couple of payments.” – Stephen Wright
“At first you don’t succeed try, try again. Then quit. There’s no point in being a damn fool about it.” – W.C. Fields

We no longer have anyone in our shop who knows Photoshop or Illustrator. It has been a challenge and we send art out when it gets too sticky for our reasonably good Corel skills.
My question is, would this be a good addition for a shop like ours…having no one who has photo editing skills.
Leanne – first thanks for reading the article and taking a minute to comment! It’s great that you have Corel skills! Lots of people get by with that and it works fine. To me, Affinity Photo or Designer are two good platforms for creative work. Like anything, you’ll need to learn them. If you have to occasionally do something in a program other than Corel, Affinity should work fine. It also opens the .psd, .ai or .eps files and allows you to work with them. Like I mentioned in the article, for production workflow I would have like to have seen a way to set halftone settings…but maybe you are handling that with your RIP software.
nice
Thanks. Your guidance and tips are important and we appreciate your efforts for sharing this great information.
No problem Emma! Happy to help.
Still a little confused about which one to choose, Adobe or Affinity.
Otherwise nice tutorial though.
You should submit it on hackr though. The design community will really like it.
https://hackr.io/tutorials/learn-affinity-photo
“Photoshop limits users to only 20 levels of undo.”
Correction – You can expand your number of History States (undo steps) in the Preferences/Performance menu.
That said, I’m very fond of the Affinity products and we’ve really taken to using Designer for as much as we can.
I have Affinity Photo. Still wondering whether I should invest in Designer. Mainly I am an enthusiast with a lively interest in photo painting.
Would welcome suggestions.
Thanks for the article. I’ve been using photoshop for doing simple animations at work lately. Does affinity have the ability to make animations?